Installing ArcGIS Enterprise
Rev. 17 August 2025
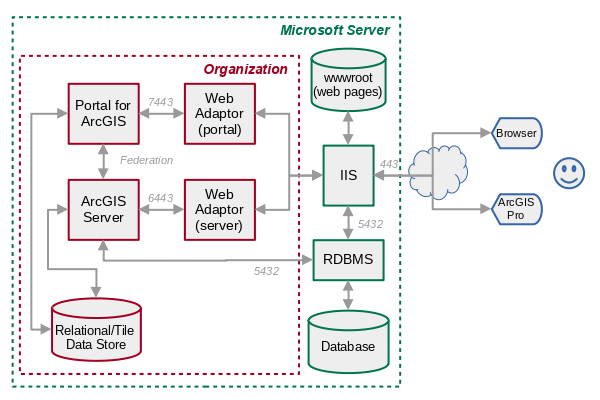
This tutorial covers the installation of ArcGIS Enterprise 11.5 on Windows Server 2025.
This configuration was a virtual server with two cores, 32 GB RAM, and 250 GB storage.
- Installation Files
- Configuring the Server
- ArcGIS Server
- ArcGIS Data Store
- Portal for ArcGIS
- Enterprise Portals in ArcGIS Pro
- PostgreSQL
- PostgreSQL Enterprise Geodatabase Administration
- Adminer
Installation Files
You will need a license (.prvc) file to authorize ArcGIS Enterprise. In commercial settings, you can get this file from your My Esri site.
Portal for ArcGIS has a separate .json license file that you can also get from My Esri or your system administrator. A license will require the following information (with values used in this install):
- ArcGIS Enterprise Version: 11.5
- Domain: https://domain.com/portal (e.g. https://arcgis.ggis.illinois.edu/portal)
- Hostname: GGIS-ARCGIS
- MAC address: E2-F7-BC-3D-6E-16
- ArcGIS Professional advanced users: 30
- Viewers: 30
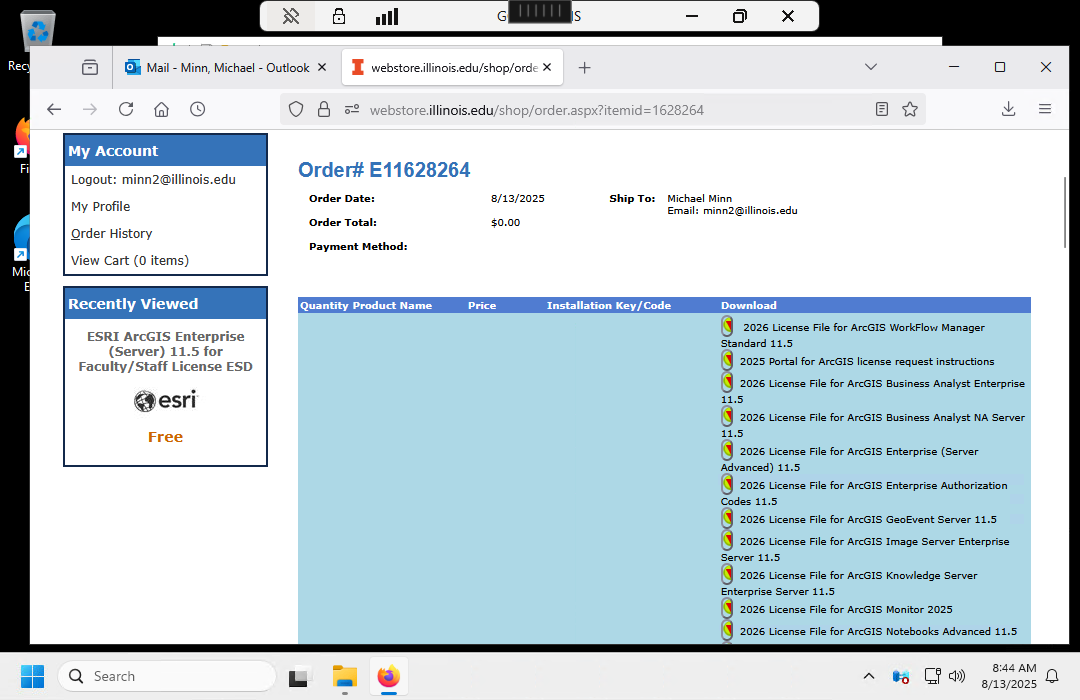
Operating under an institutional license at the University of Illinois, I downloaded installation files from our webstore.illinois.edu, who administers our organization.
- ArcGIS Server (Windows): There are two files that include a .exe installer file and a much larger .exe.001 volume file.
- 2026 License File for ArcGIS Enterprise (Server Advanced) 11.5 (.prvc file)
- ArcGIS Data Store (Windows)
- Portal for ArcGIS (Windows) (.exe installer and .exe.001 volume file)
- ArcGIS Web Adaptor (IIS Windows)
- PostgreSQL 16.8 DBMS for Windows
Configuring the Server
You will need to configure the server and web services before setting up ArcGIS Enterprise.
Security Patches
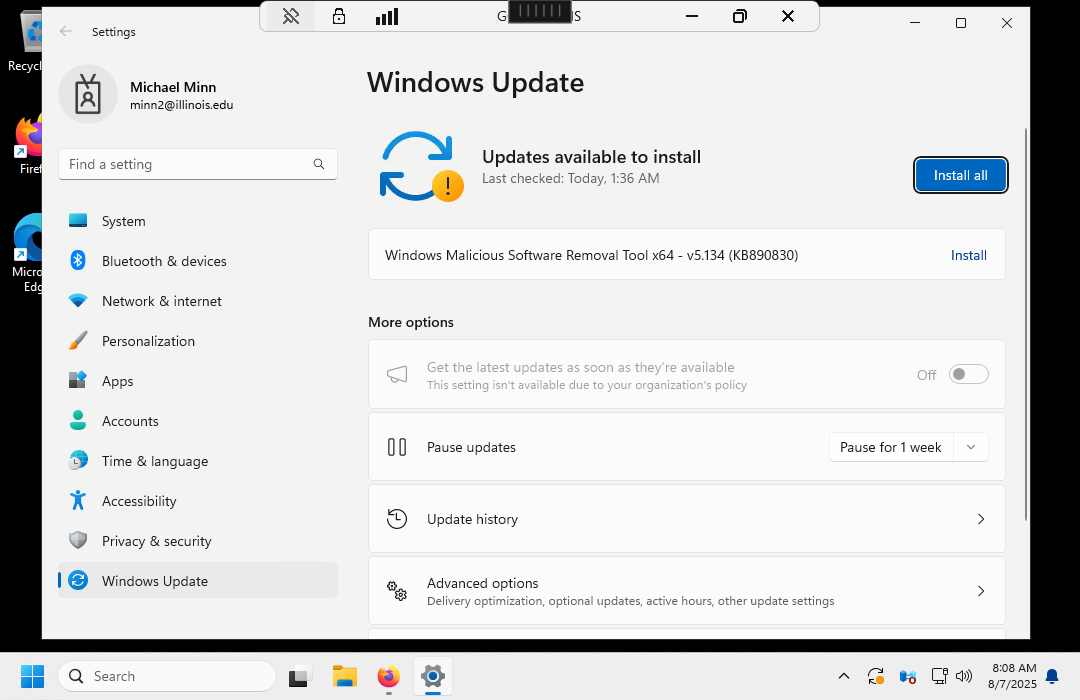
The version of Microsoft Server in the image should be updated with the most recent patches as quickly as possible after configuration to optimize system security. The version in the image will be old and servers are prime targets for hacking bots.
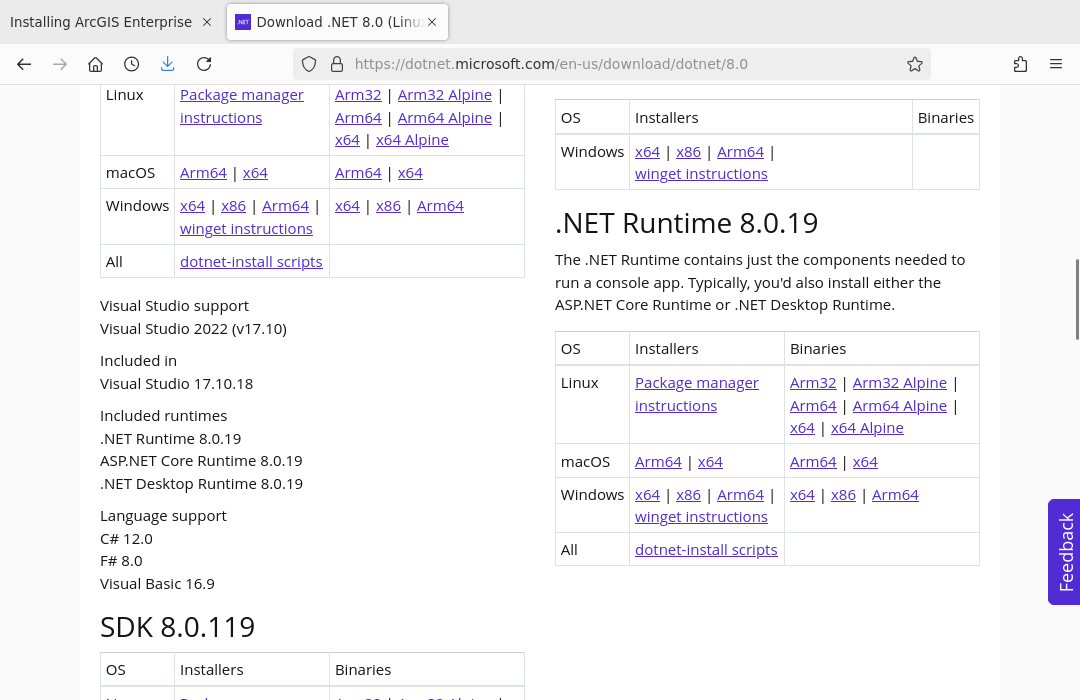
Additional Windows Components
Install these additional Windows components.
ArcGIS Server
ArcGIS Server is the ArcGIS Entrprise component that listens for service requests and responds with formatted data from the data store or enterprise database.
- Start the self-extracting installer .exe file (ArcGIS_Server_Windows_115_195344.exe).
- Destination Folder for Files: Accept the default in your user Documents folder (next)
- After installation files are extracted, select Launch the setup program and Close.
- Allow the app to make changes to your device.
- Splash screen (next)
- Welcome screen (next)
- Master agreement: Accept (next)
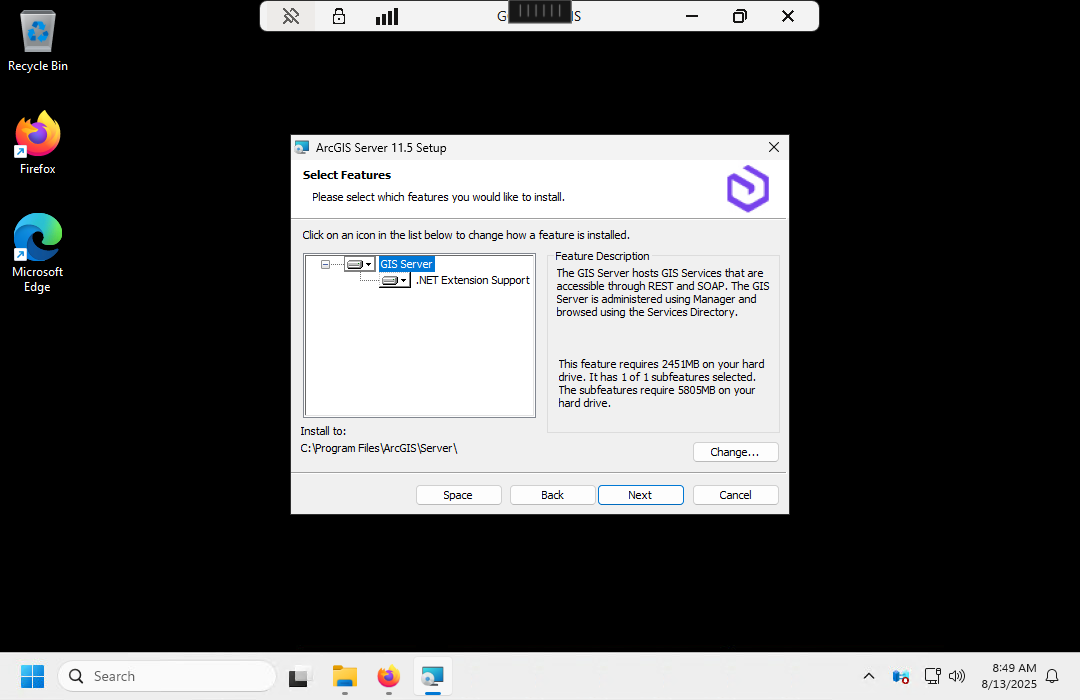
- Select Features: Use the defaults (next)
- Specify ArcGIS Server Account: Leave the default name (arcgis) but supply a password
- Export server configuration file: Do not export configuration file (unnecessary for a single-server install) (next)
- Ready to Install the Program: Took me about an hour (install)
- ArcGIS Server 11.5 has been successfully installed: (Finish)
- Authorization Options: I have received an authorization file and am no ready to finish the authorization process (browse to the .prvc file and Next)
- Authorization Method: Authorize with Esri now using the Internet
- Authorization Information: This information should be populated from your .prvc file. Add a comment if needed.
- Authorization information: Choose the organization, industry, and personal classifications.
- Software Authorization Number: This should be populated from the .prvc file (Next)
- Authorize Software Extensions: I do not want to authorize any extensions at this time (Next)
- Evaluate Software Extensions: Leave blank (Next)
- Authorizing Software: Congratulations, your software has been authorized and is now ready for use (Finish)
Server Setup
The Server Manager web page will open (https://localhost:6443/arcgis/manager).
- Accept the self-signed certificate warning
- ArcGIS Server Setup Wizard: Create New Site
- Primary Site Administrator Account: Supply a new site administrator username (siteadmin is the default) and password (Next)
- Specify Root Server Directory and Configuration Store: Accept defaults (Next)
- Configuration Summary: Click Finish to create your ArcGIS Server site. This will take a few minutes

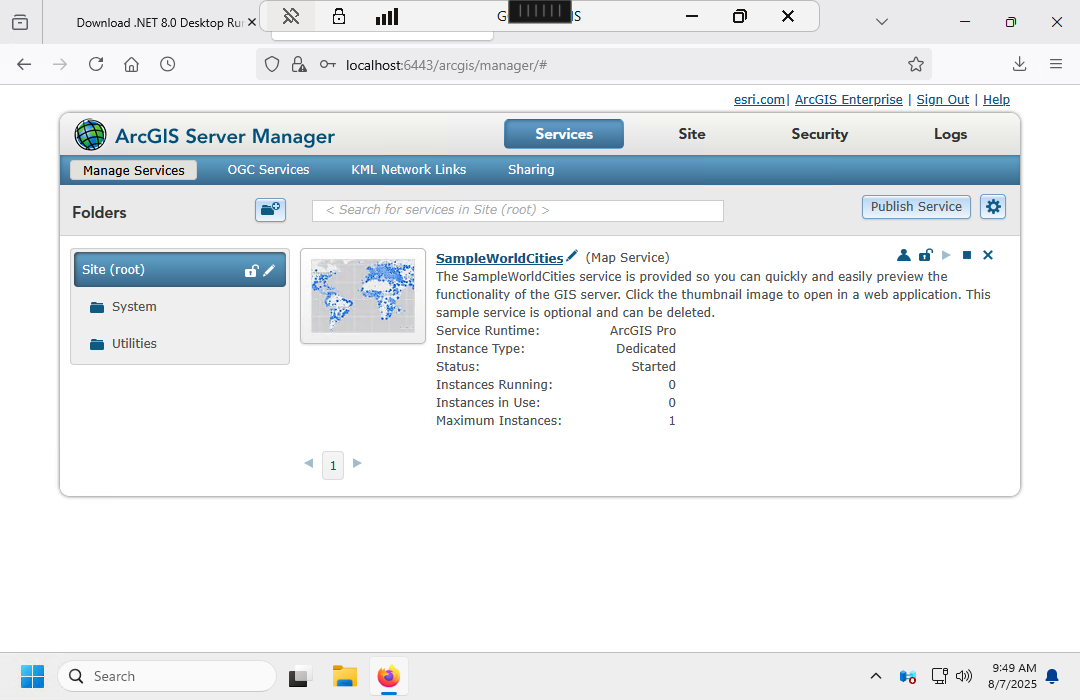
The ArcGIS Server Manager will appear. Log in (https://localhost:6443/arcgis/manager).
Server Web Adaptor Configuration
Configure the first Web Adaptor for the server to route port 443 to server port 6443.
- Launch the Web Adaptor self-extracting installer .exe
- Destination Folder for Files: Accept the default in your Documents folder.
- The installer will complete: Launch the setup program (Close)
- IIS requirements verification: If you have missing components, click I agree to install those components. This was my list:
- IIS Management Console
- ISAPI Extensions (missing)
- ISAPI Filters (missing)
- Request Filtering
- Windows Authentication (missing)
- Static Content
- WebSocket Protocol (missing)
- The Web Adaptor setup will start.
- Web Adaptor setup splash screen: (Next)
- Welcome: (Next)
- Master Agreement: I accept (Next)
- Select Web site for the Web Adaptor: Default Web Site (443)
- Name for the ArcGIS Web Adaptor (IIS): arcgis (default for the server - Next)
- Ready to Install the Program: This took me around one minute (Install)
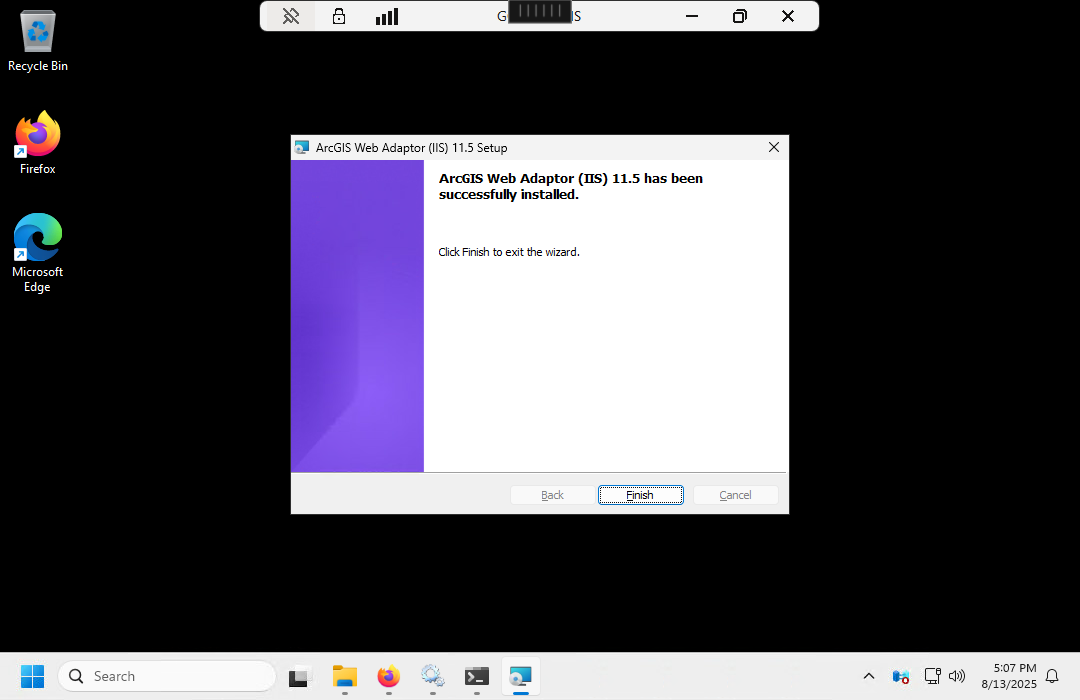
- Successfully installed: (Finish)
- The https://localhost/arcgis/webadaptor configuration page will launch with a certificate warning. Go to https://domain.com/arcgis/webadaptor instead.
- Which component: Select GIS, Image, Workflow Manager, GeoAnalytics or Knowledge Server. Ignore the This web adaptor is not configured with an ArcGIS Enterprise component message because that is what you are doing in this step.
- Configure the web adaptor.
- GIS, Image, Workflow Manager, Geoanalytics or Knowledge Server: The URL to the host name on port 6443 (https://domain.com:6443).
- The Administrator Username (siteadmin) and Administrator Password are from your server manager configuration above (Next)
- Configure
- The confirmation will display at the bottom of the refreshed configuration screen.
- Enter the URL for the ArcGIS Server Manager page (https://localhost/arcgis/manager) to verify port 443 is rerouted to server port 6443.
- Try accessing the ArcGIS Server Manager on an outside browser using the domain name (https://domain.com/arcgis/manager).
Test the Map Service
Although you will almost certainly prefer to access services through Portal for ArcGIS as described below, you can use ArcGIS Pro with feature and tile services directly on the server.
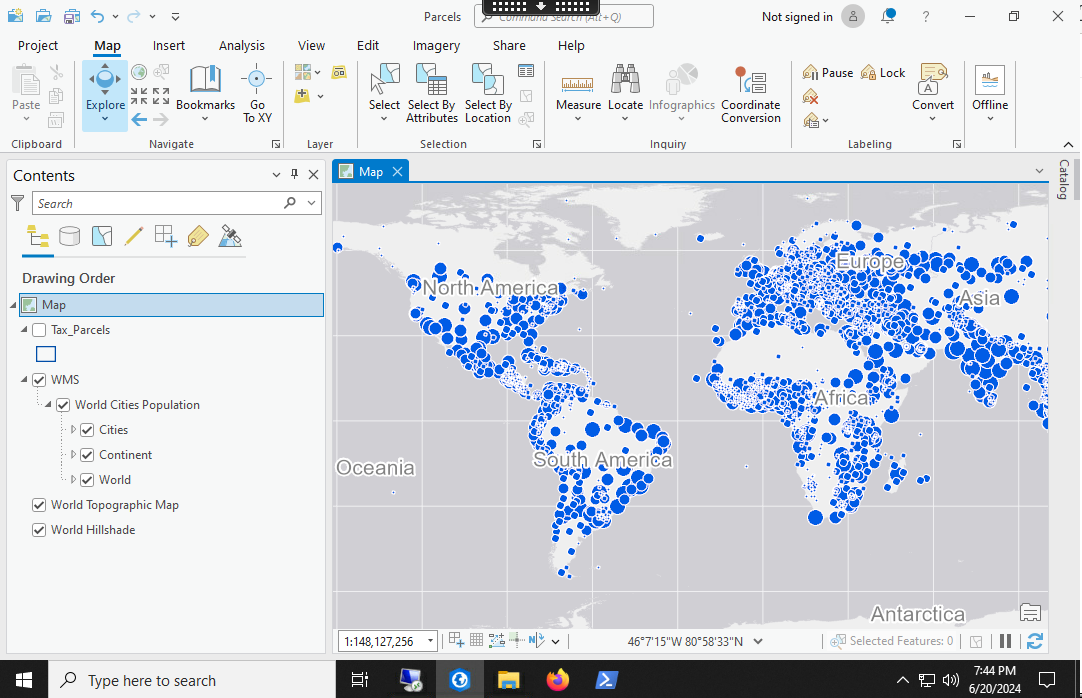
ArcGIS Server comes with a sample map service to test connectivity.
- Start ArcGIS Pro and open a new Map project.
- On the Map ribbon, click Add Data and Data From Path.
- Enter https://domain.com/arcgis/services/SampleWorldCities/MapServer/WMSServer.
- The map should display after a few seconds.
Publish a Map Service
Although it is generally easier to publish feature services via Portal, you can publish map services to your server through the Catalog Pane.
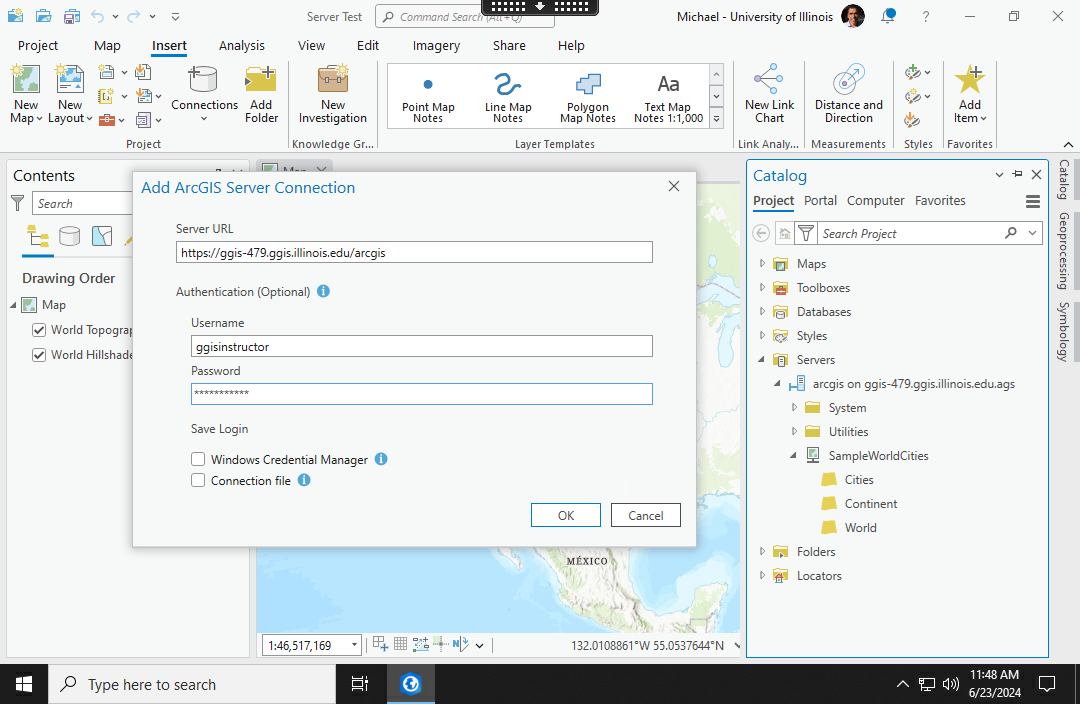
- Add a connection to the server.
- In the Insert ribbon, under Connections, Add Connection, Server, ArcGIS Server.
- Add the Server URL (https://localhost:6443/arcgis) and the user credentials (see above).
- In the View ribbon, open the Catalog Pane and confirm the server is visible.
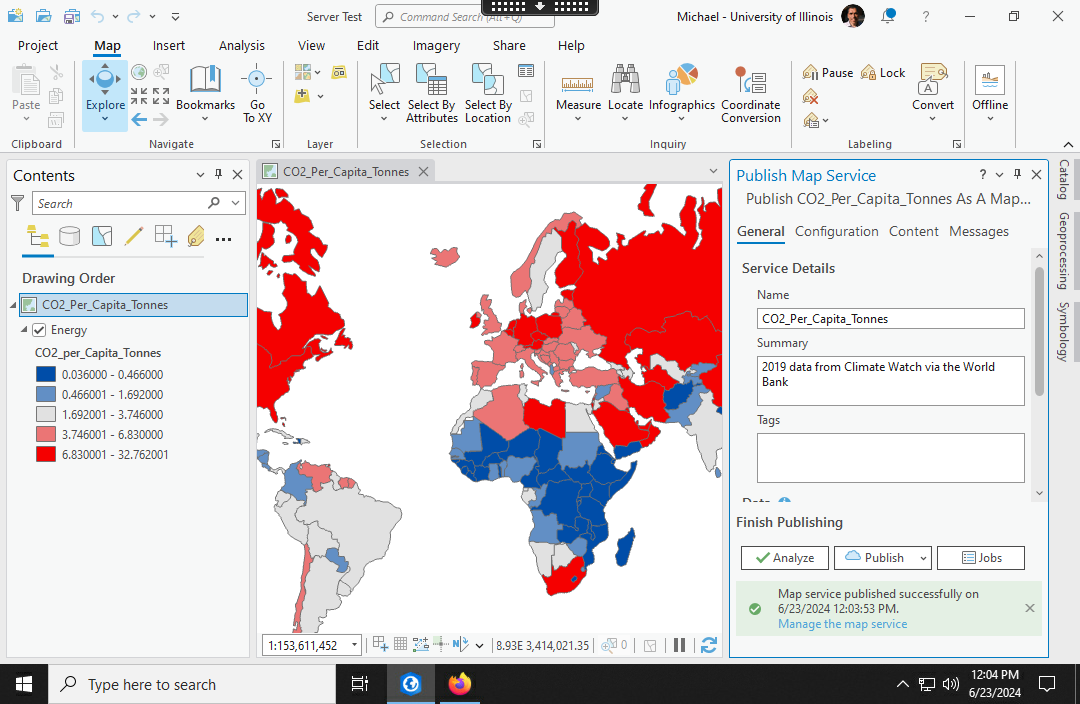
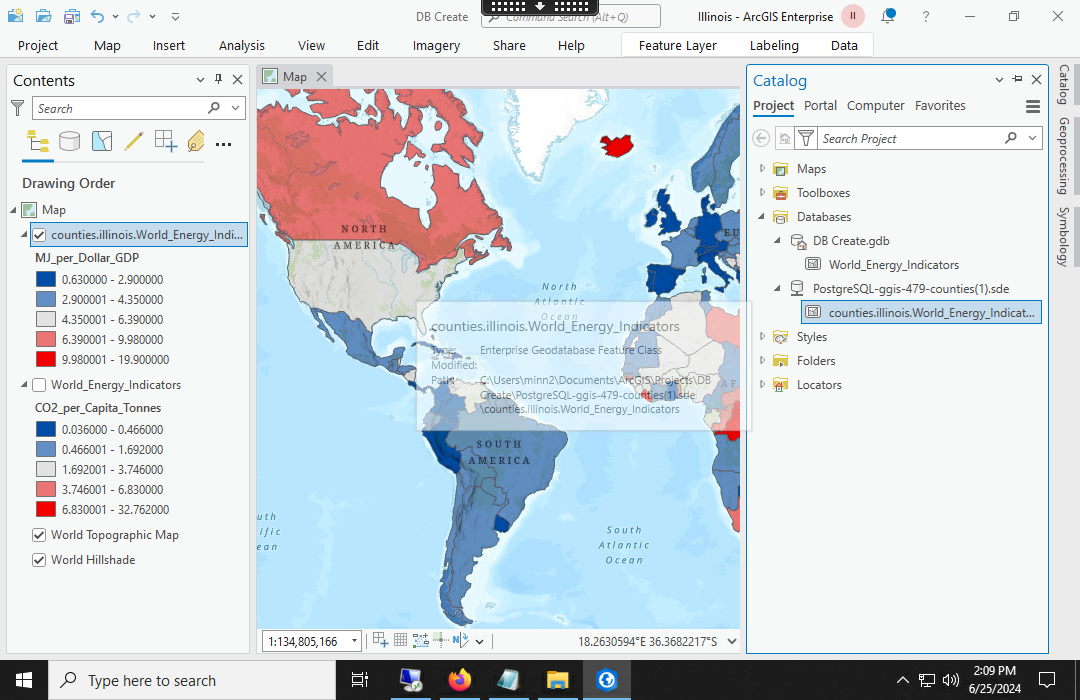
- Create and symbolize a map. In this case we use Export Features to copy data from an existing Minn 2019 World Energy Indicators ArcGIS Online feature service into the project geodatabase.
- Remove the base map since those come from a separate tile service and cannot be republished.
- Right click on the server in the Catalog Pane and select Publish, Map Service.
- Select the map you wish to publish.
- Select Copy all data to copy data from the project geodatabase to the map service.
- Analyze to confirm there are no errors.
- If you get the Error 00374 Unique IDs are not assigned error, click on the ellipsis (...) beside the error and select Auto-Assign IDs Sequentially.
- Publish the service. This may take a minute or two depending on the amount of data.
- Confirm availability of the service in the Catalog Pane and create a new map and verify that the feature service can be added as a new layer.
ArcGIS Data Store
The ArcGIS Enterprise data store stores data for portal:
- Relational data store: Used by portal to store hosted feature layers
- Tile cache data store: Used to store caches for hosted scene layers
- Object store: Used to store objects (files) uploaded to the portal
To install and configure:
- Launch the Data Store self-extracting installer .exe.
- Destination Folder for Files: Accept the default in your Documents folder.
- The installer will complete: Launch the setup program (Close)
- Splash screen: (Next)
- Welcome: (Next)
- Master Agreement: Accept and (Next)
- Select Features: Accept the defaults - Relational data store, Tile cache data store, Object store (Next)
- Specify ArcGIS Data Store Account: The server user name (arcgis) and password set above
- Export account configuration file: Unnecessary for a single server system (Next)
- Ready to Install: Took me around 25 minutes (Install)
- Successfully installed: (Finish)
- The configuration web page will open (https://localhost:2443/arcgis/datastore).
- Accept the self-signed certificate.
- GIS Server: Enter the server host name (domain.com) with the site administrator username (siteadmin) and password from above.
- Specify Content Directory: Leave the default (C:\arcgisdatastore)
- ArcGIS Data Store Type: Relational and Object. For this educational configuration, I ignored the message, Configuring additional data stores on the same machine as an object store is not recommended.
- Configuration Summary: This took me around five minutes (Finish)
- Configuration Status: Confirmed
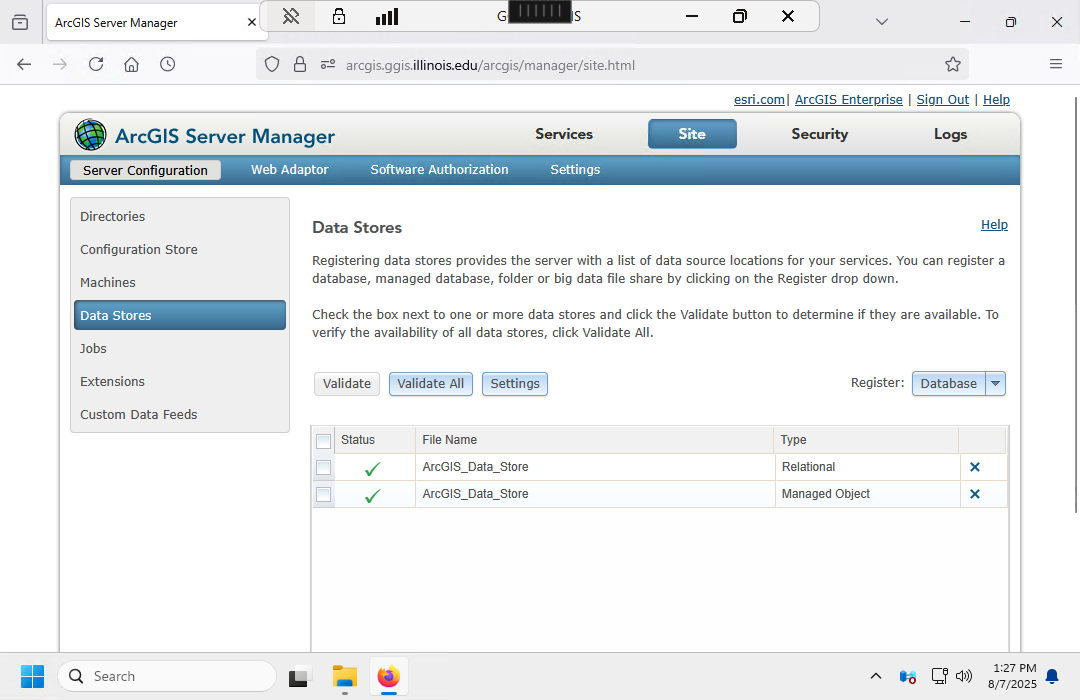
- Log into the server manager (https://domain.com/arcgis/manager).
- Go to the Site and Data Stores and Validate All
- Validation will take a few seconds.
Portal for ArcGIS
Portal for ArcGIS is a service that provides a flexible web-based user interface to access, manage, and web map data store(s) and ArcGIS Servers. Portal is the same interface used by ArcGIS Online, except it runs on your server rather than one of ESRI's cloud servers.
You will need to obtain a portal authorization file from My Esri or your system administrator before you can create a portal. This is a separate (.json) file from the .prvc file used to authorize the server.
Install Portal
- Launch the Portal for ArcGIS self-extracting installer .exe.
- Destination Folder for Files: Accept the default in your Documents folder.
- The installer will complete: Launch the setup program (Close)
- Splash screen: (Next)
- Welcome: (Next)
- Master Agreement: Accept and (Next)
- Destination Folder: Accept the default (C:\Program Files\ArcGIS\Portal) (Next)
- Specify the Portal for ArcGIS directory: Accept the default (C:\arcgisportsl) (Next)
- Specify the Portal for ArcGIS Account: The server user name (admin) and password set above
- Export Portal for ArcGIS configuration file: Unnecessary for a single server system (Next)
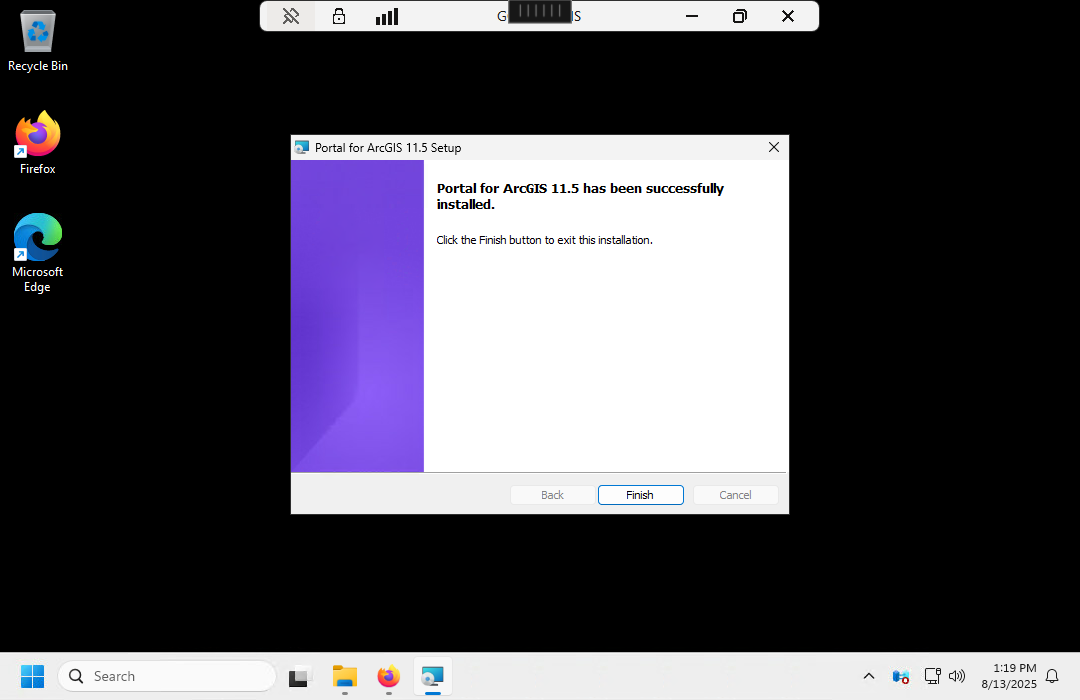
- Ready to Install: This took me around two hours.
- Successfully installed.
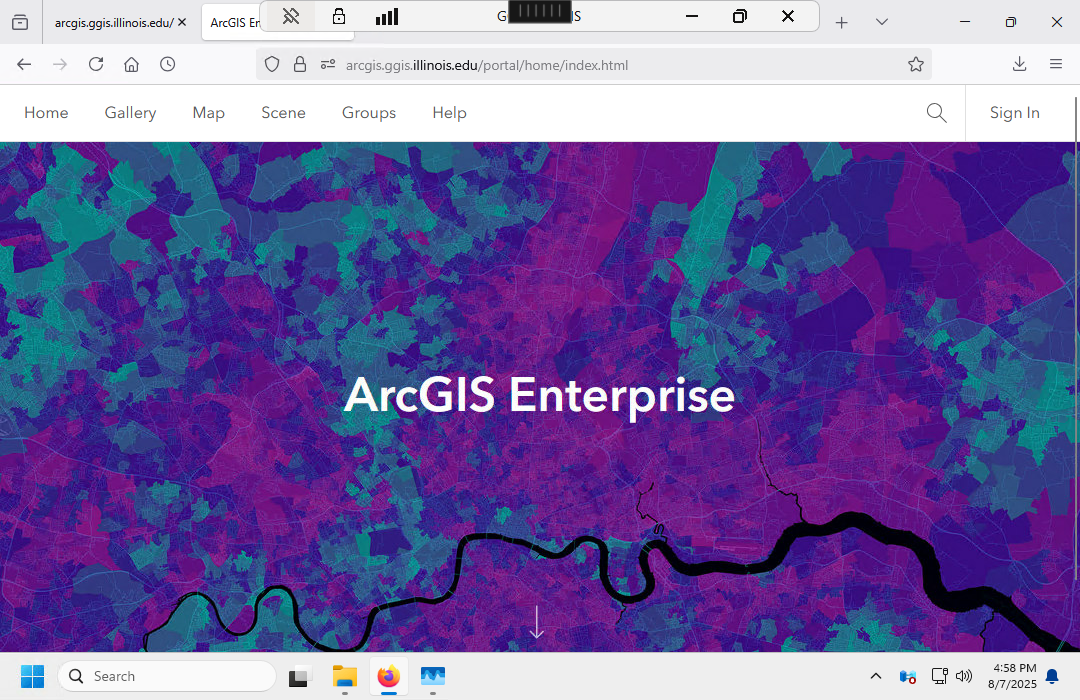
- Clicking Finish from the installer will take you to the portal home page (https://localhost:7443/arcgis/home)
- Accept the self-signed certificate.
- Create or Join a Portal: Create New Portal (Next)
- Import License File: Browse to the license .json file (Next)
- Create initial administrator account: For simplicity, you may wish to use the site administrator credentials you configured above (siteadmin) (Next)
- Enter Additional Account Information: Add administrator account information (Next)
- Set Content Directory: Keep the default (C:\arcgisportal\content) (Next)
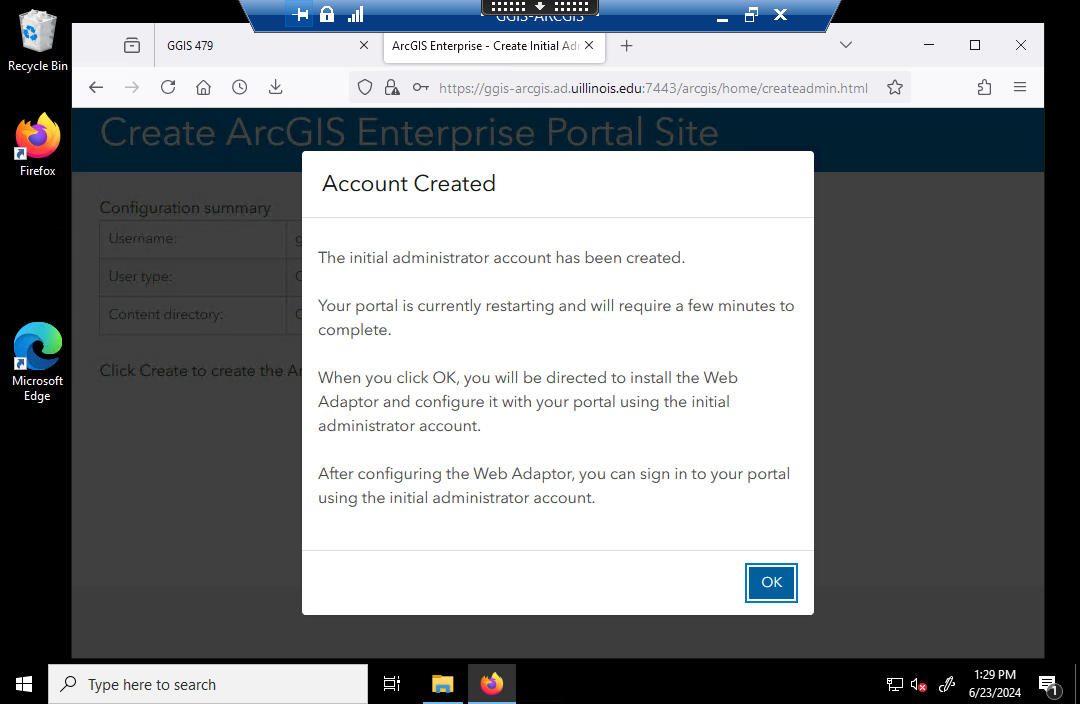
- Configuration summary: Click Create to create the portal. This took around fifteen minutes to complete.
- Account created: (OK)
- Next steps: Install the web adaptor (below).
Portal Web Adaptor
You need to create a second installation of ArcGIS Web Adaptor that will reroute server requests on port 433 to port 7443 used by ArcGIS Portal.
- Note that this is completely separate installation of Web Adaptor from the Web Adaptor you installed above to route server requests to port 6443.
- If you try to configure a single Web Adaptor twice, you can get errors when attempting to authenticate into different server and portal services.
To install a second Web Adaptor:
- Launch the web adaptor installer .exe again.
- Splash screen: (Next)
- Welcome: (Next)
- Master Agreement: Accept (Next)
- Select Web site for the Web Adaptor: Default Web Site (443) (Next)
- New Virtual Directory: portal (Note that this needs to be changed to be distinct from the server arcgis web adaptor name)
- Ready to Install the Program: This takes a couple of minutes (Install)
- Successfully installed: (Finish)
The installer will launch the ArcGIS Web Adaptor configuration page (https://localhost/portal/webadaptor).
- Accept the security risk from the self-signed certificate.
- Which component?: Select Portal for ArcGIS (Next)
- Accept the security risk from the self-signed certificate.
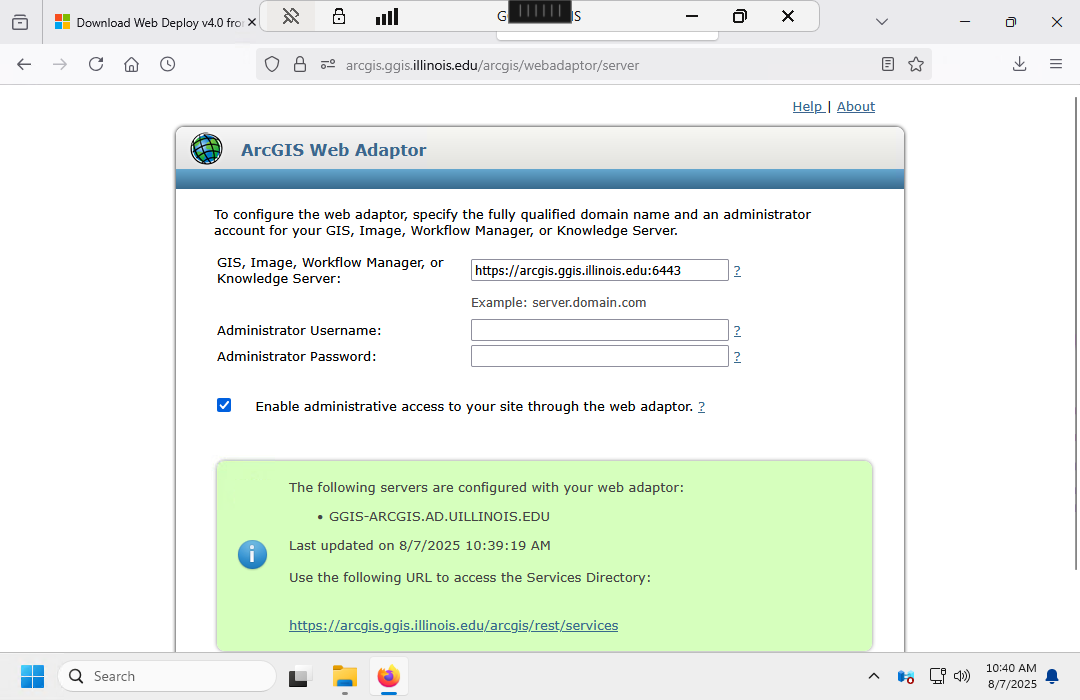
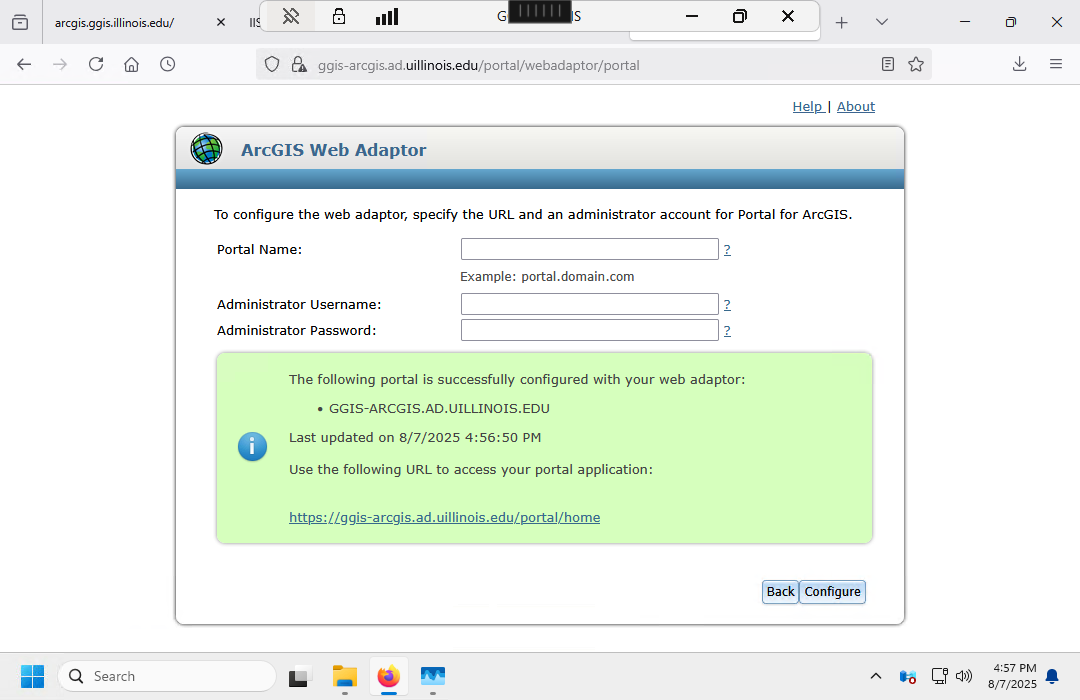
- To configure the web adaptor...
- The Portal Name should be the domain name (domain.com) with no portal prefix.
- Use the portal administrator username/password from above (siteadmin).
- This will take a couple of minutes to complete.
- The confirmation will be the green box under the form.
Enter the Portal URL (https://domain.com/portal/home) to verify port 443 is rerouted to server port 7443.
If you get the Invalid redirect_uri error when you try to log in, you may need to manually edit the configuration for your Portal web adaptor to change the web adaptor URL to use the appropriate domain name. This occurred on my system because the domain name (arcgis.ggis.illinois.edu) actually resolves to ggis-arcgis.ad.uillinois.edu.
- Log in to the portal admin console using the server name (https://servername/portal/portaladmin).
- Portal admin console: Select System
- System: Select Web Adaptors
- Web Adaptors: Select the web adaptor
- Add /edit to the end of the URL in the browser to edit the web adaptor.
- Change the Web adaptor URL from the machine name to the portal home page using the domain name (https://domain.com/portal/home).
- Click Edit Web Adaptor. This will take a minute or two to restart the portal.
- The portal should now be accessible through https://domain.com/portal/home.

Federate The Server to Portal
Federation is the interconnection of servers to delegate security. Portal for ArcGIS can be federated with ArcGIS Enterprise so that server security can be managed conveniently through Portal's full-featured interface.
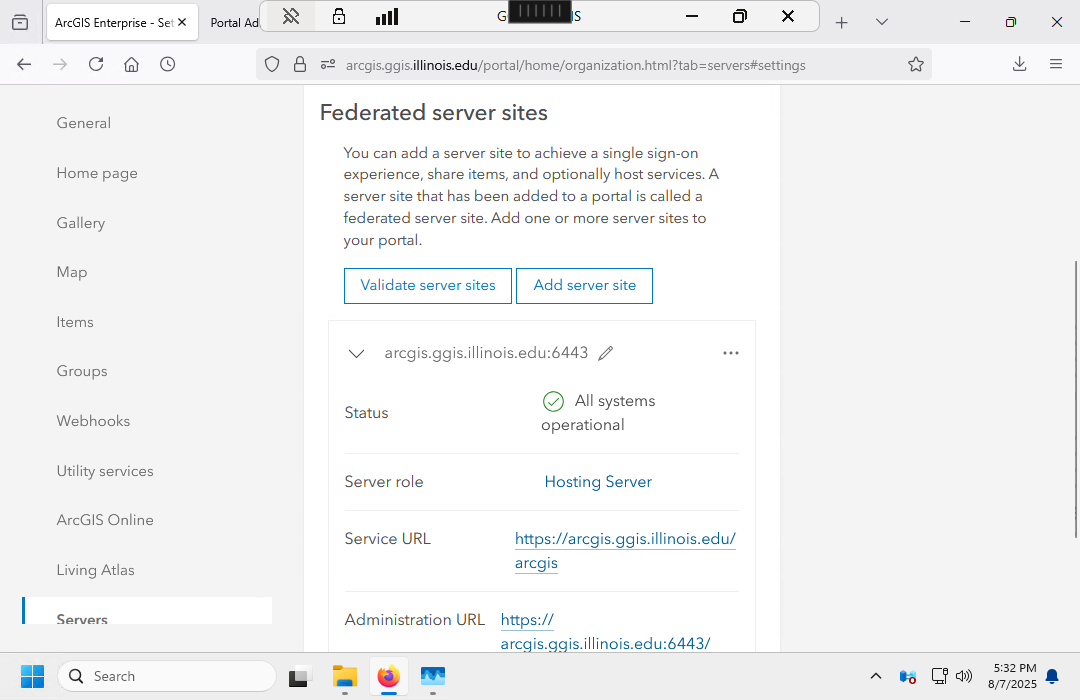
- In Portal, go to Organization, Settings, Servers and select Add Server Site.
- Services URL: https://domain.com/arcgis
- Administration URL: https://domain.com:6443/arcgis
- Admin credentials: Use the server credentials (siteadmin) configured above (Next)
- Configure server role: Configure as a Hosting Server (Save server role)
- If you have any problems federating through the Portal settings, you can also federate (and unfederate) through the portal administration page (https://localhost:7443/portal/portaladmin) under Servers, Select the federated server, and Unfederate.
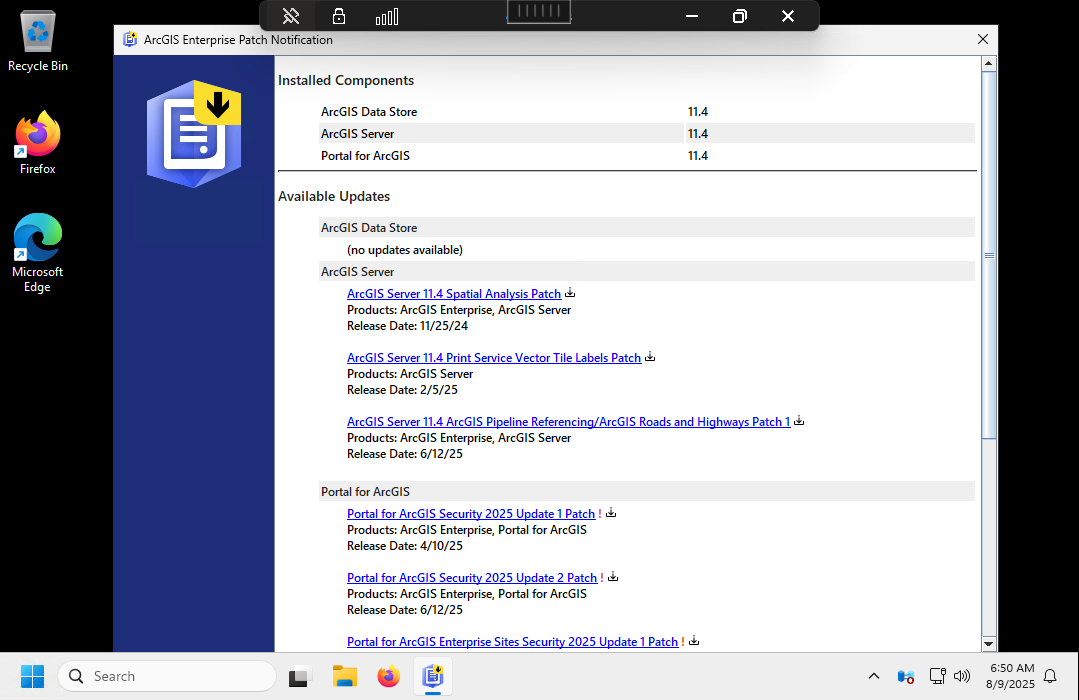
Patches
To maximize security and minimize bugs, you should generally install the latest patches to the software.
You can find the latest patches at the ESRI support page, but the more convenient choice is to use ArcGIS Enterprise Patch Notifications. These should appear in the Recommended section of your start menu, but you can also run the tool manually from Start Menu, All Apps, ArcGIS, ArcGIS Server, Check for ArcGIS Enterprise Updates.
- Review the list of available updates.
- Click the download icon by the first patch.
- Select Update to install the patch. Note that these patches can have equivalent install times to the original software (e.g. two hours for Portal).
- Repeat for successive patches.
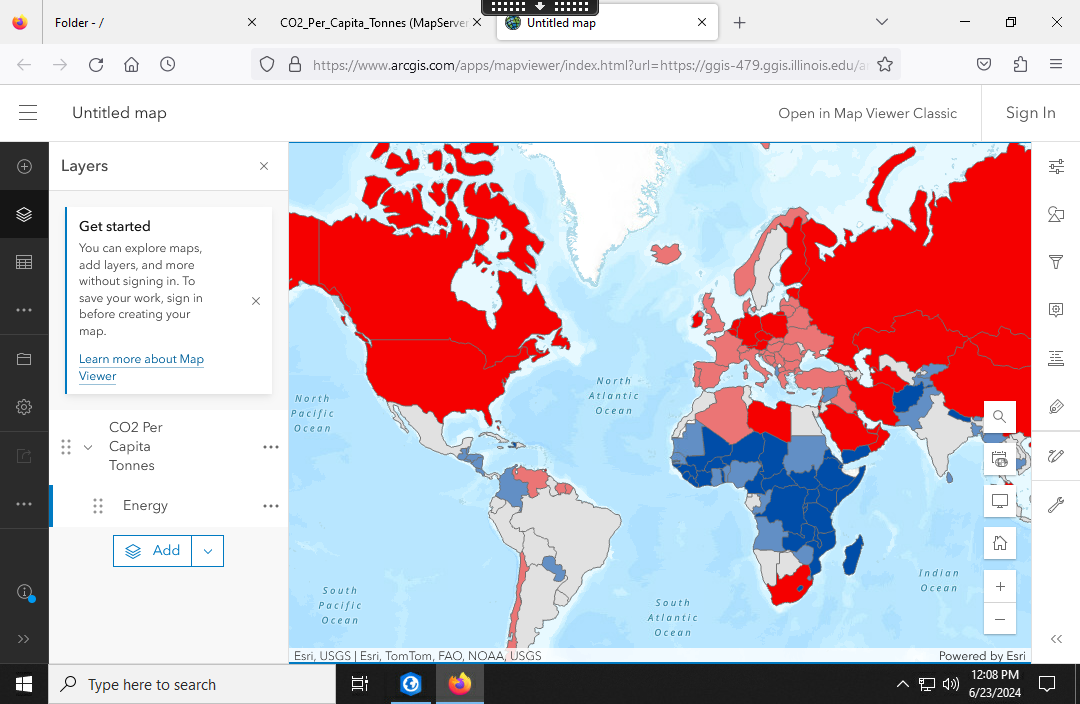
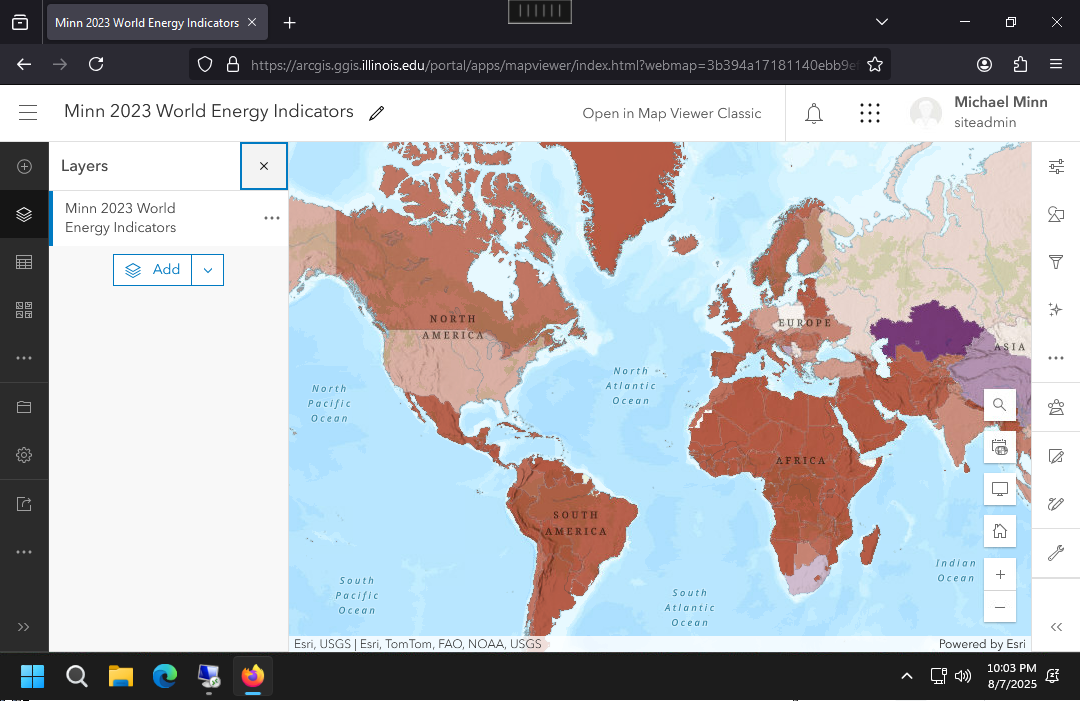
Test Publishing in Portal
You should try uploading a geospatial data file into the portal to create a hosted feature service and map.
- Log in to portal.
- In the Content page, select New and browse to a geospatial data file. This example is created using a GeoJSON file with a collection of energy-related indicators from the US Energy Information Administration and the World Bank.
- When prompted, choose to publish as a Hosted feature layer.
- Open the new layer in Map Viewer.
- Symbolize as needed.
- Save the map.
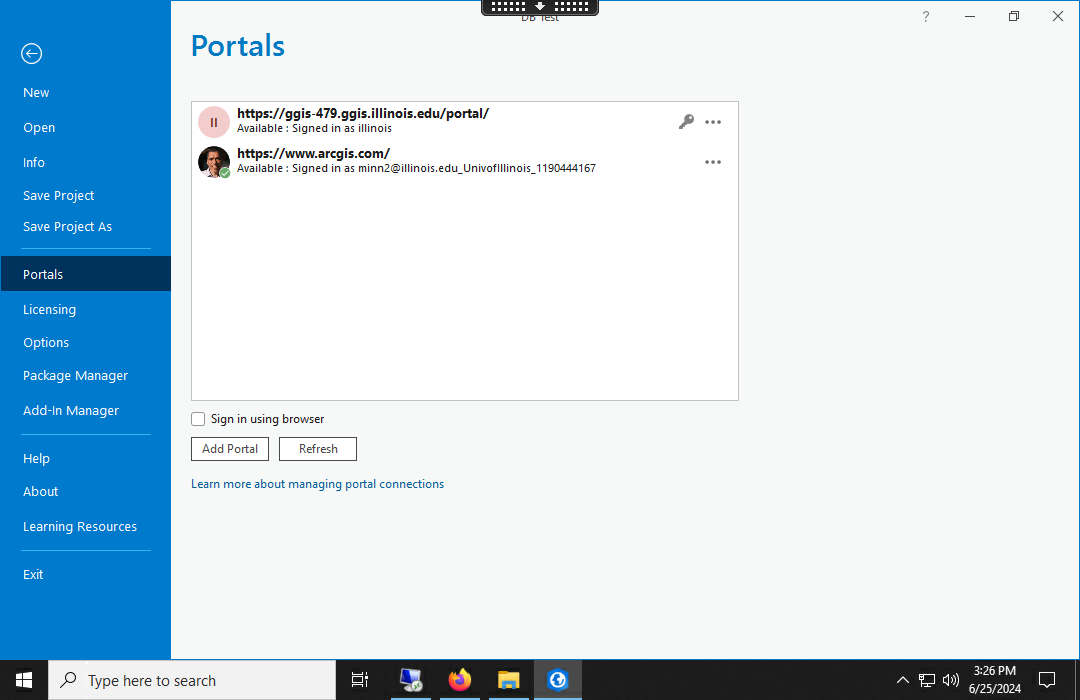
Enterprise Portals in ArcGIS Pro
You can use choose between ArcGIS Online and Portal for ArcGIS as the server you use for both publishing new services and for managing existing services.
- Go into Settings, select Portals and Add Portal with the portal URL (https://domain.com/portal)
- Click the user name at the top of the screen to change the active portal that will be used when adding or publishing data.
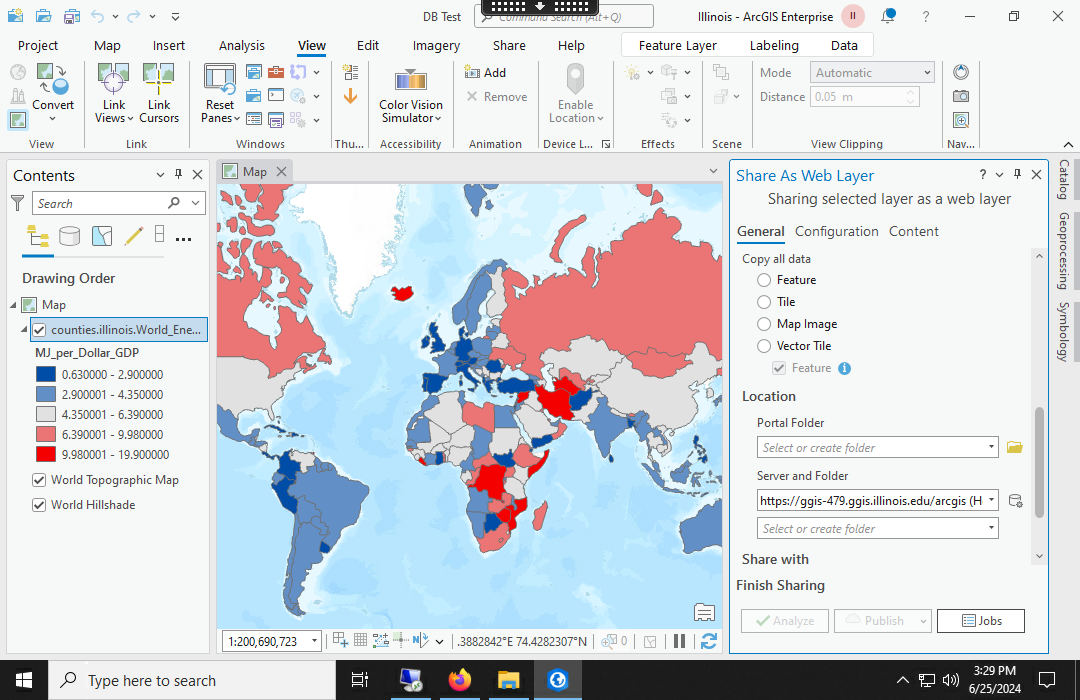
Publishing a Feature Layer
Click the user name at the top of the screen to change the active portal that will be used when adding or publishing data.
The active portal is used when you Share as Web Layer.
Using Portal for License Authorization
With ArcGIS Pro you need access to a portal that authenticates you as a licensed user. While in academic settings ArcGIS Online is used as the portal, you can also use ArcGIS Enterprise for license authentication.
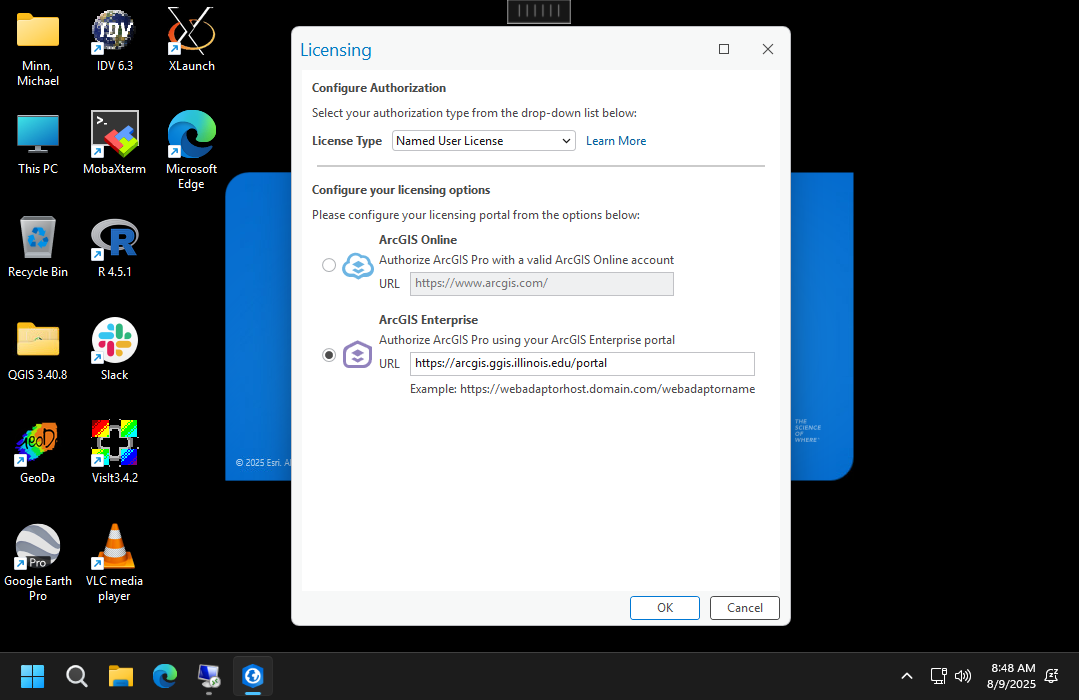
Start ArcGIS Pro and select Configure Licensing.
- ArcGIS Enterprise: Enter your portal URL (https://domain.com/portal)
- Log in to ArcGIS Enterprise.
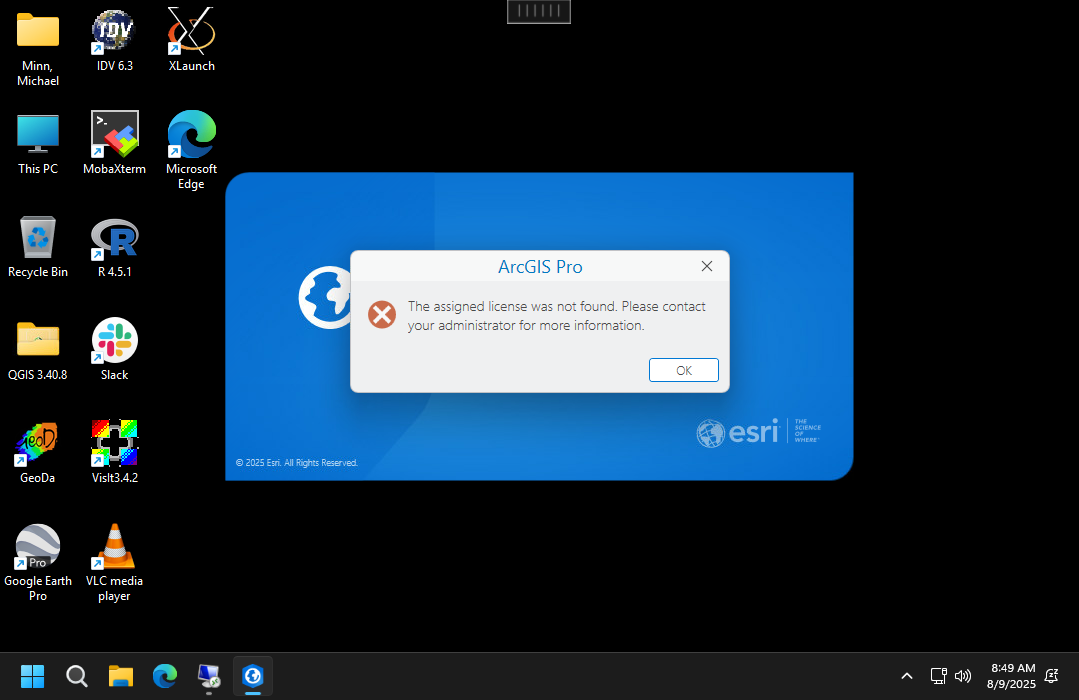
If you try to log in to ArcGIS Pro and get the message, "An assigned license was not found. Please contact your administrator for more information," the problem may be that the portal URL specified in your portal licence .json file does not match the public URL of the portal you are trying to use.
You (or your site administrator) needs to create a new license file in My Esri with the correct portal URL and you need to import that license file into the portal under My Organization, Licenses. Note that the URL should begin with https and have no closing slash (/) at the end.
PostgreSQL
The PostgreSQL relational database management system with PostGIS extensions can be used as an enterprise geodatabase data store with ArcGIS Enterprise.
Installing PostgreSQL
Although the installed data store seems to run PostgreSQL processes, you need to install PostgreSQL to be able to set up a separate geodatabase.
Check the supported version numbers before installing. For this installation I used PostgreSQL 16.8 with PostGIS 3.1.11.
- Launch the self-extracting installer .exe.
- Destination Folder: Accept the default (Next)
- Launch the setup program: (Close)
- The installer begins:
- Welcome: (Next)
- Installation Directory: Keep the default (Next)
- Select Components: Include all (Next)
- Data Directory: Keep the default (Next)
- Password: Provide a password for the database superuser (named postgres).
- Port: Keep default port 5432 (Next)
- Locale: English, United States (Next)
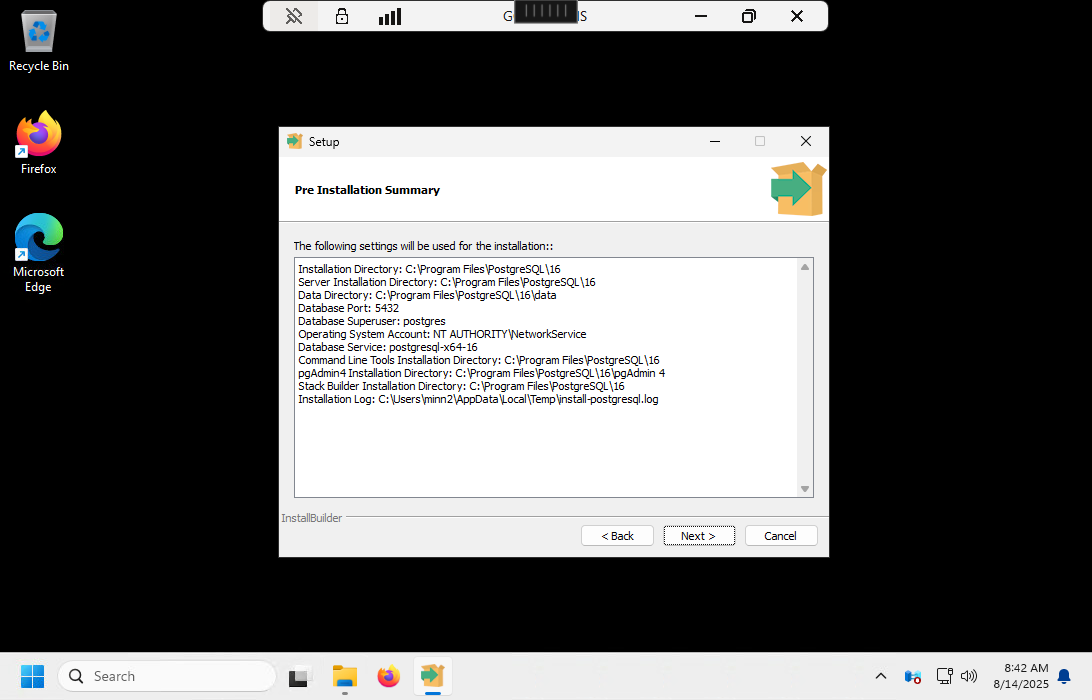
- Pre Installation Summary: Review (Next)
- Ready to Install: The install took about thirty minutes.
- Completing: (Finish)
PostGIS
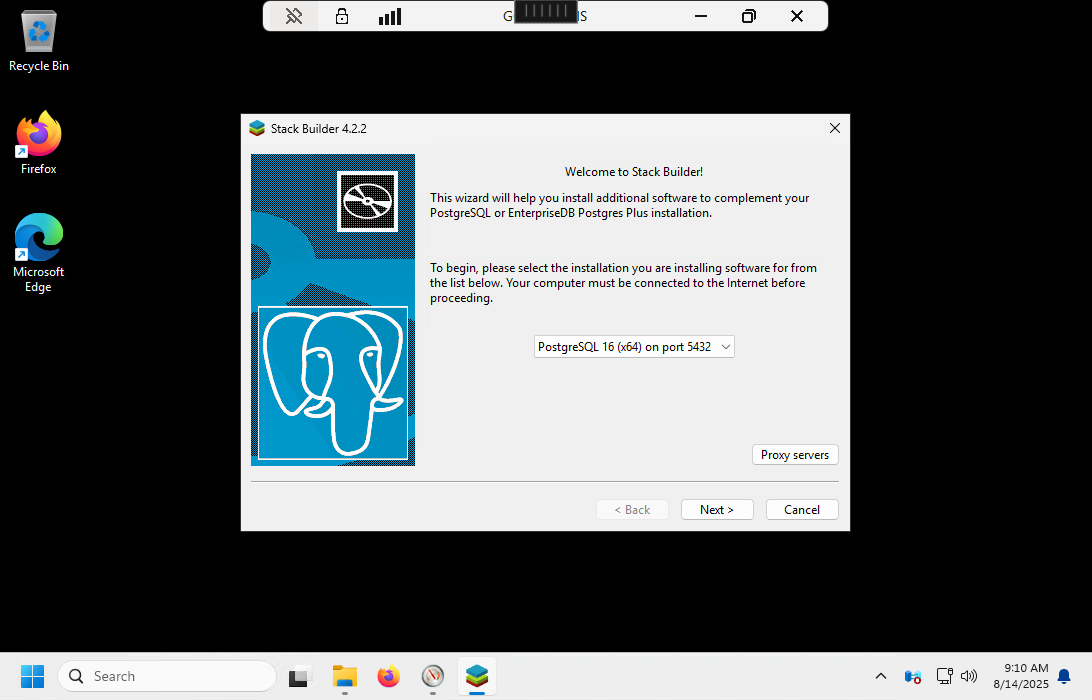
After the PostgreSQL installer completes, the Stack Builder component installer will start.
- Welcome to Stack Builder: Select PostgreSQL 16 (x64) on port 5432 (Next)
- Select applications: Spatial Extensions, PostGIS 3.5 bundle (Next)
- Review: The application will freeze (not responding) for a couple of minutes during the download.
- Start the installations: (Next)
- License agreement: (I Agree)
- Choose Components: Select everything (Next)
- Choose Install Location: Keep the default (Next)
- Database Connection: Specify database connection credentials (see above) (Next)
- Database Name: Keep the default demonstration database. The install will take a few seconds (Install)
- Installation Complete: (Close)
- Installation Completed: (Finish)
Remote Access
If you need remote access to the database from another machine, you will first need to configure the database to receive connections.
- Open C:\Program Files\PostgreSQL\16\data\postgresql.conf and replace listen_addresses = 'localhost' with:
listen_addresses = '*'
host all all 0.0.0.0/0 scram-sha-256
If you are running Adminer on an older system (libpq 9.x.x), you will get the message: Unable to connect to PostgreSQL server: SCRAM authentication requires libpq version 10 or above.
You will need to revert to the less secure md5 authentication.
- Change the line in pg_hba.conf:
host all all 0.0.0.0/0 md5
password_encryption = md5
ALTER USER user_name WITH PASSWORD 'new_password';
PostgreSQL Tools
Command line tools are available from the PowerShell in the installation bin folder.
cd 'c:\Program Files\PostgreSQL\16\bin'
>psql is the interactive shell.
.\psql -U postgres database_name
pg_dump can be used to backup to .sql files.
.\pgdump -U postgres -f backup_file.sql database_name
You can restore from a .sql file with psql.
.\psql -U postgres -d database_name -f backup_file.sql
Because this is a database-level utility, you may need to Register with geodatabase any restored tables before you can use them.
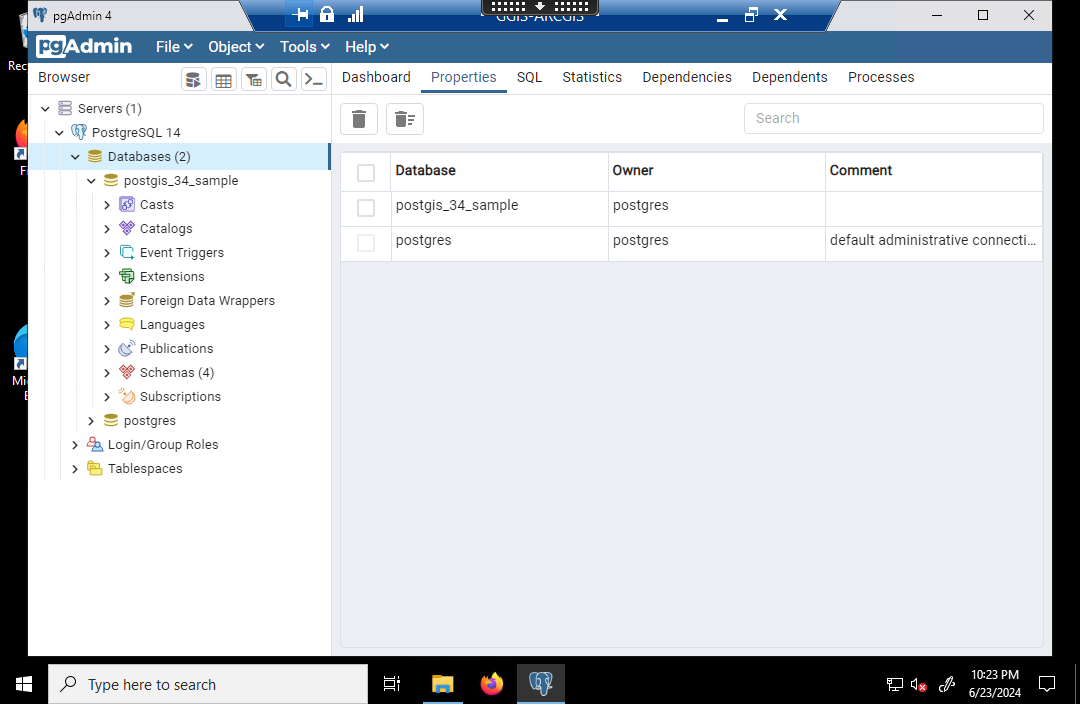
pgAdmin 4
pgAdmin 4 is the administrative console that comes with PostgreSQL.
- Search for pgAdmin 4 and start it.
- Set a master password that you will use to keep login credentials from prior sessions.
- You should be able to sign in to the database when you expand the list.
If you do not see a database in the list, or if you get the Instance...is not persisted error when you try to create a new database:
- Delete the C:\Users\%USER%\AppData\Roaming\pgadmin folder.
- Delete the C:\Users\%USER%\AppData\Local\pgadmin folders.
- Restart pgadmin.
- Perform the configuration steps above again.
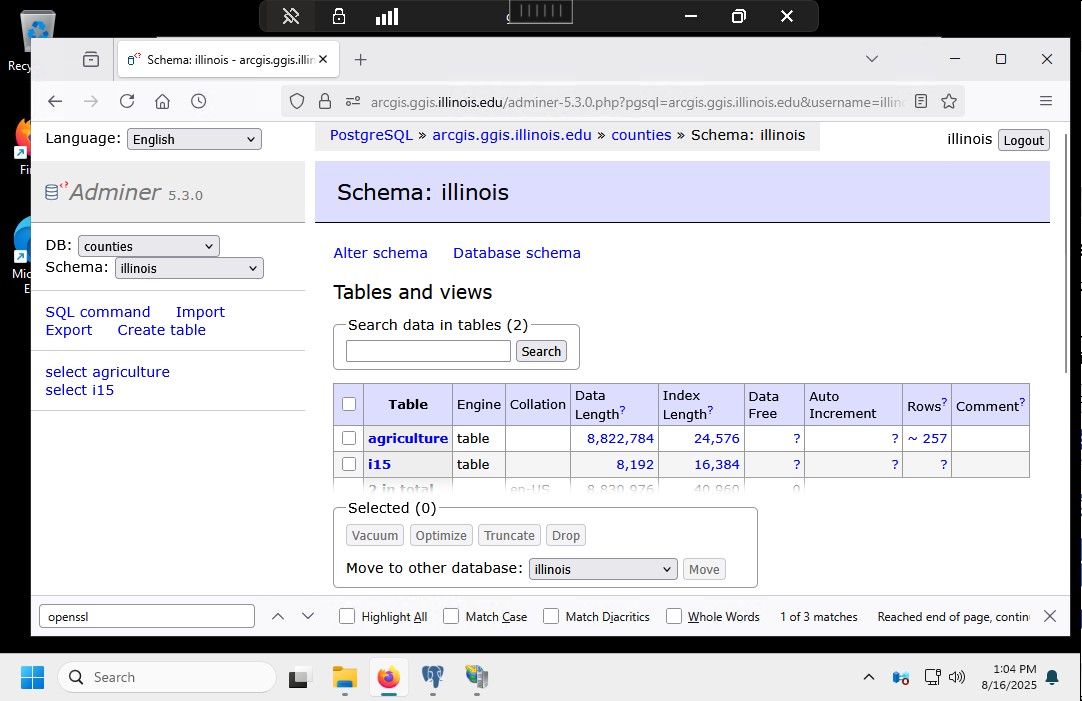
PostgreSQL Enterprise Geodatabase Administration
You will generally want to perform administrative actions through ArcGIS Pro when using the server for geodatabases that will be used by ESRI software.
Keep the PostgreSQL hierarchy in mind:
- A PostgreSQL server can contain multiple databases.
- A database can contain multiple schema.
- A schema is a set of relational database tables.
- A schema is owned by a single user with the same name as the schema.
- The schema owner can delegate access and editing privileges to other users.
- A table is a collection of related data organized into rows and columns.
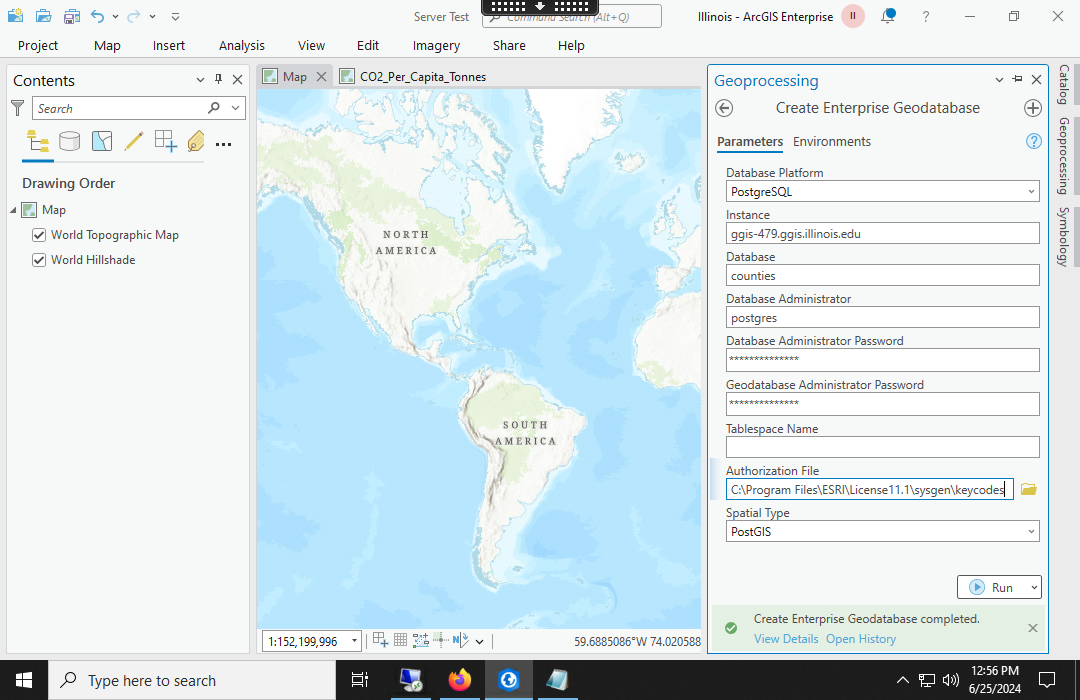
Create a Database
You can create new databases in ArcGIS Pro with the Create Enterprise Geodatabase tool.
- Database Platform: PostgreSQL
- Instance: The server name with no protocol (domain.com)
- Database: Provide a meaningful name (counties)
- Database Administrator: The superuser (postgres)
- Database Administrator Password: See above
- Geodatabase Administrator Password: Provide a new password
- Authorization file: C:\Program Files\ESRI\License11.5\sysgen\keycodes
- Spatial Type: PostGIS
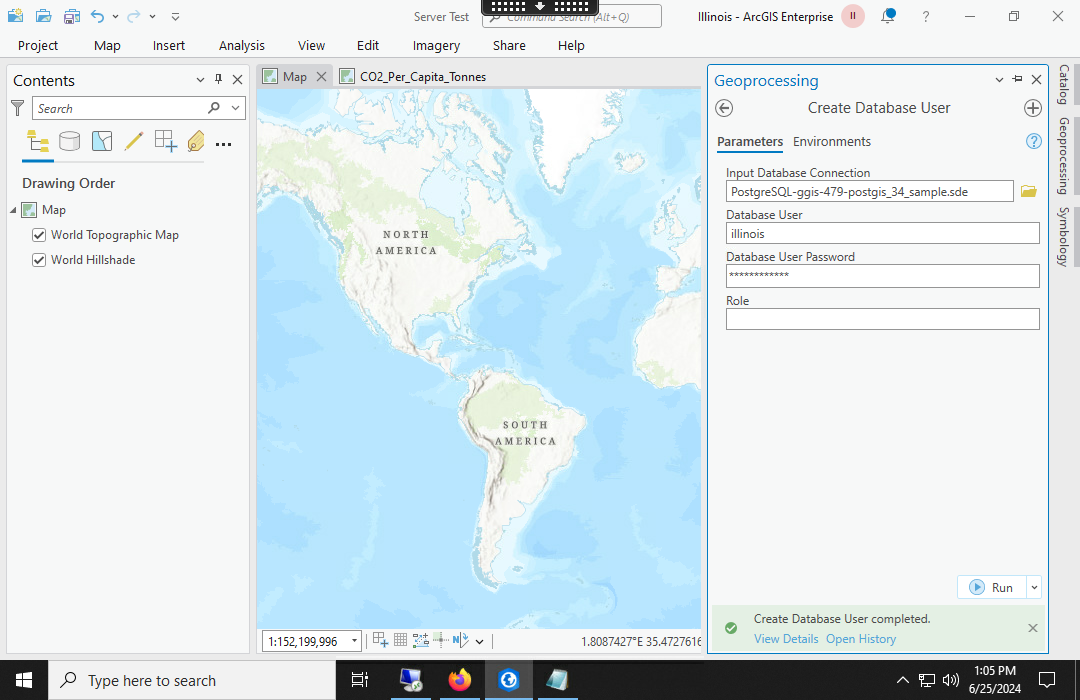
Create a New User and Schema
A schema is a set of relational database tables stored in a database.
To create a new schema, you need to use the Create Database User tool to create a new user that owns the schema.
- Input Database Connection: Browse to find the database you connected above (as superuser postgres).
- Database User: The name of the new user
- Database User Password: The password for the new user
Connecting to a Database
You need to connect to a database before you can perform other actions.
Note that once you have connected to a database as a user, you will need to completely shut down and restart ArcGIS Pro if you wish to connect to the database as another user. This can be especially annoying for systems administrators when performing both administrator tasks (user postgres) and tasks as a database user.
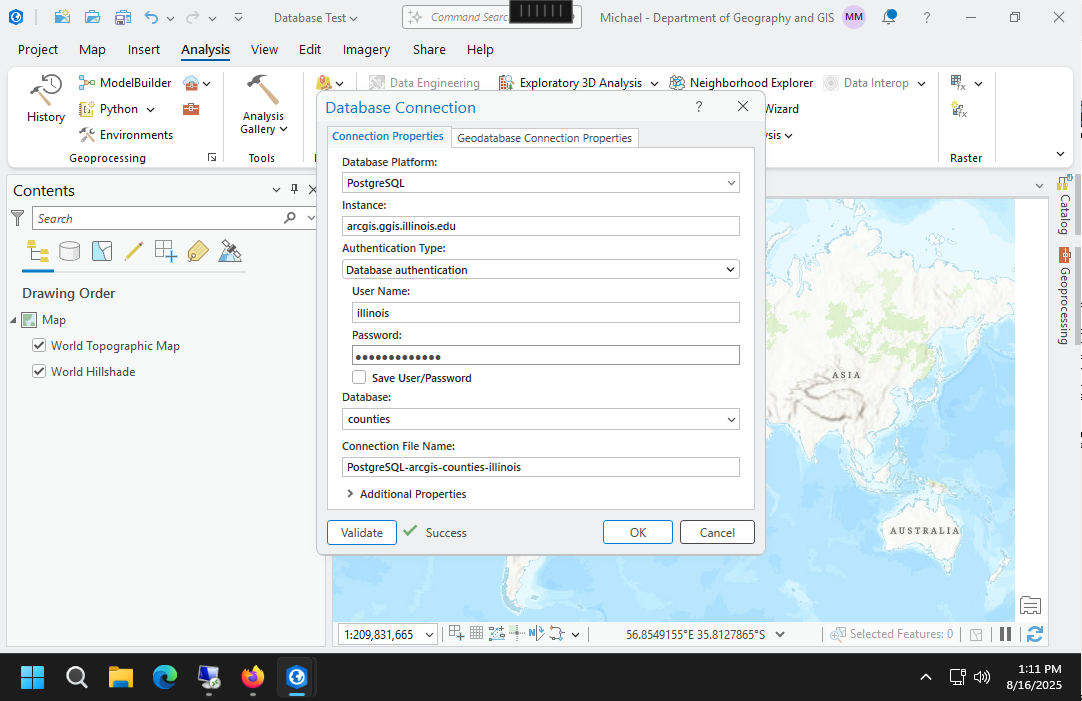
In the ArcGIS Pro Catalog pane, right click on Databases and select New Database Connection.
- Database Platform: PostgreSQL
- Instance: The server name
- Authentication Type: Database authentication
- User Name: The user/schema name
- Password: The password
- Save User/Password: This needs to be set or database registration will fail later.
- Database: The name of the database
Copying Data into an Enterprise Geodatabase
Copy and paste a test feature class from the project geodatabase to the newly connected database. You can also view the new table in pgAdmin.
Register the Data Store with Portal
To share feature services from the database, you will need to register your data store with portal.
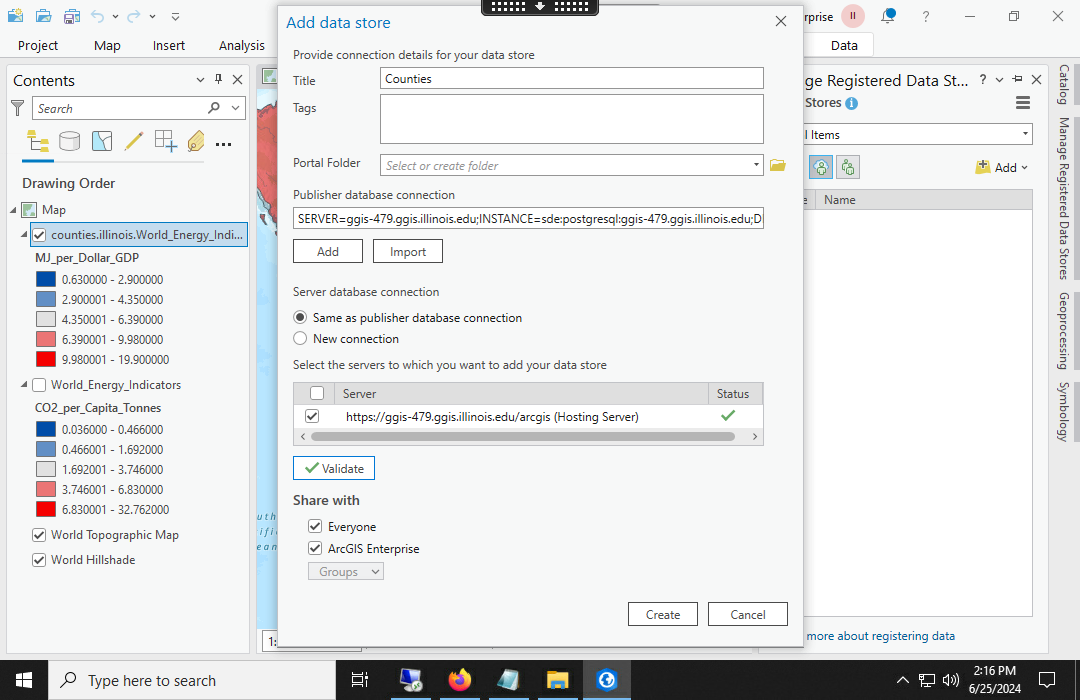
On the Share ribbon, select Data Stores, confirm that the drop-down list is set to Portal Items, and click the Add button.
- Title: The name of the data store
- Publisher database connection: Click Add and fill in the same connection information given above.
- Server database connection: Same as publisher database connection
- Select the servers to which you want to add your data store: Select your portal
- Sharing: Share as appropriate
If your connection gets a Validation Error: The connection property set was missing a required property, you likely need to create a new connection where you save the username and password.
Test publish a layer using data from the database using Reference registered data and Feature.
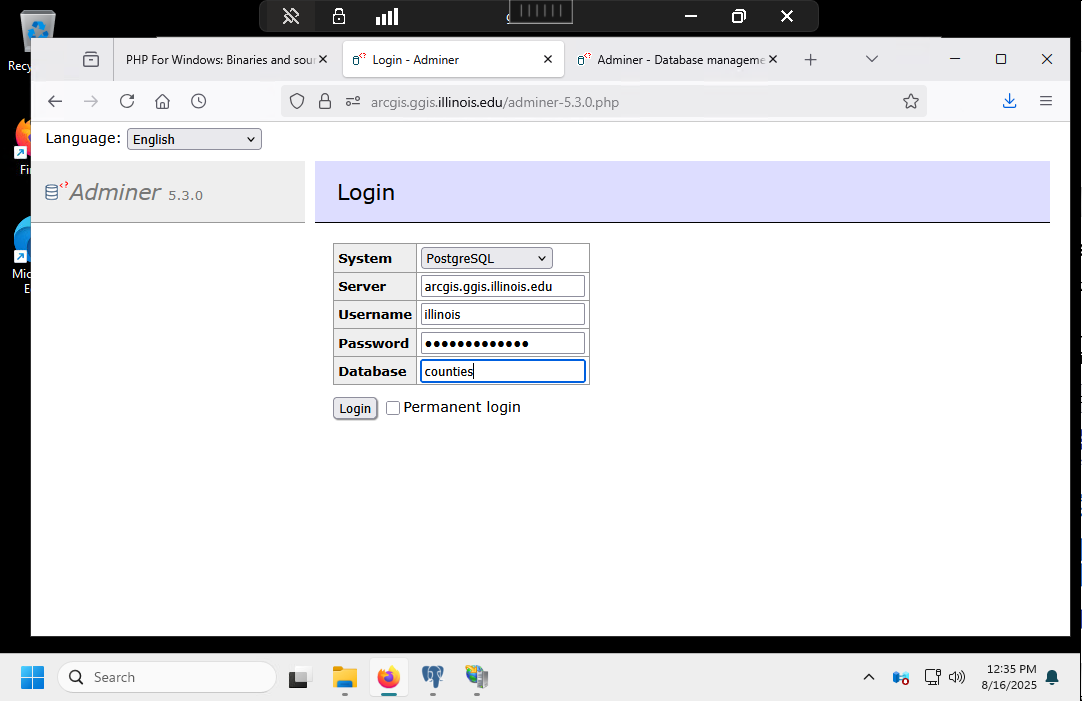
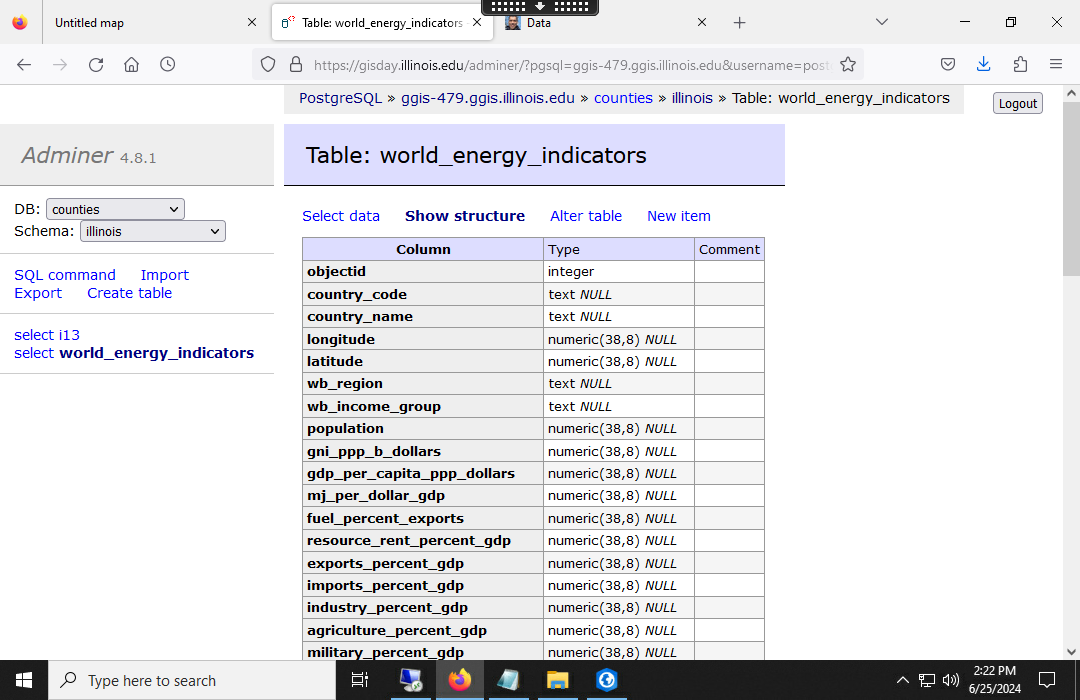
Adminer
Adminer is a web-based database management application written in PHP. While pgAdmin 4 is powerful and full-featured, it is also complex and challenging for users who are new to relational databases. Adminer is a tidier solution for teaching interaction with databases using SQL. The challenge with Adminer on a Windows platform is that installation requires quite a few manual steps.
Enable FastCGI
FastCGI is a protocol for interfacing with interactive programs with a web server.
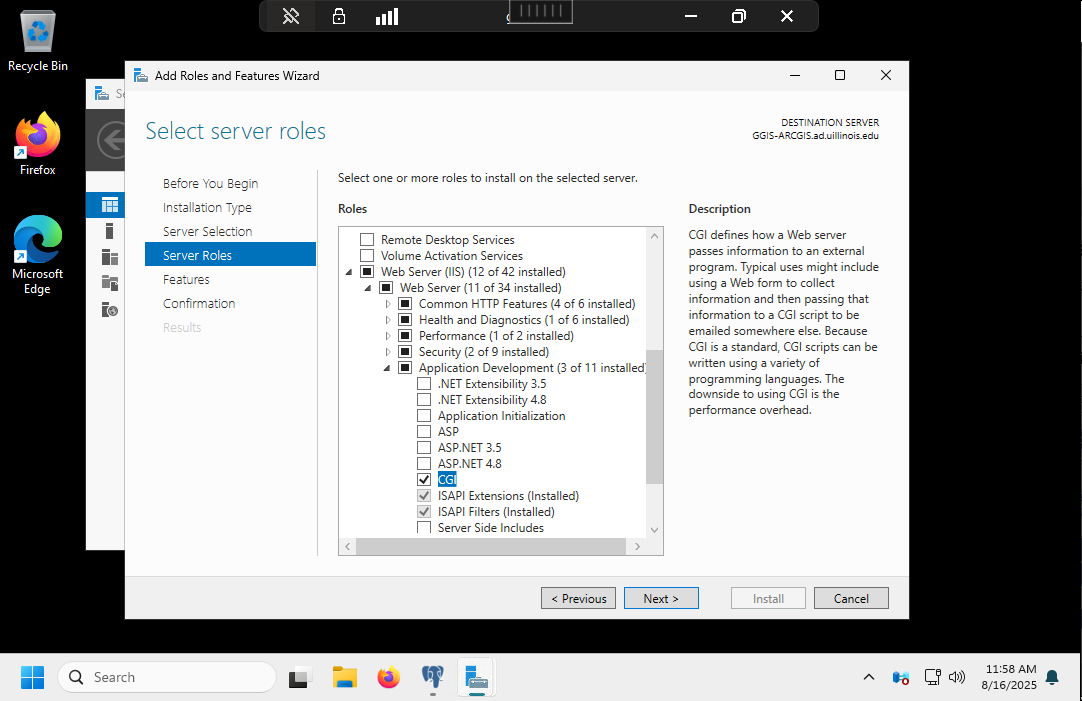
- Open Server Manager.
- Select Manage, Add Roles and Features.
- Go to Server Roles, Web Server, Application Development.
- If CGI is not checked, check it Next through to install.
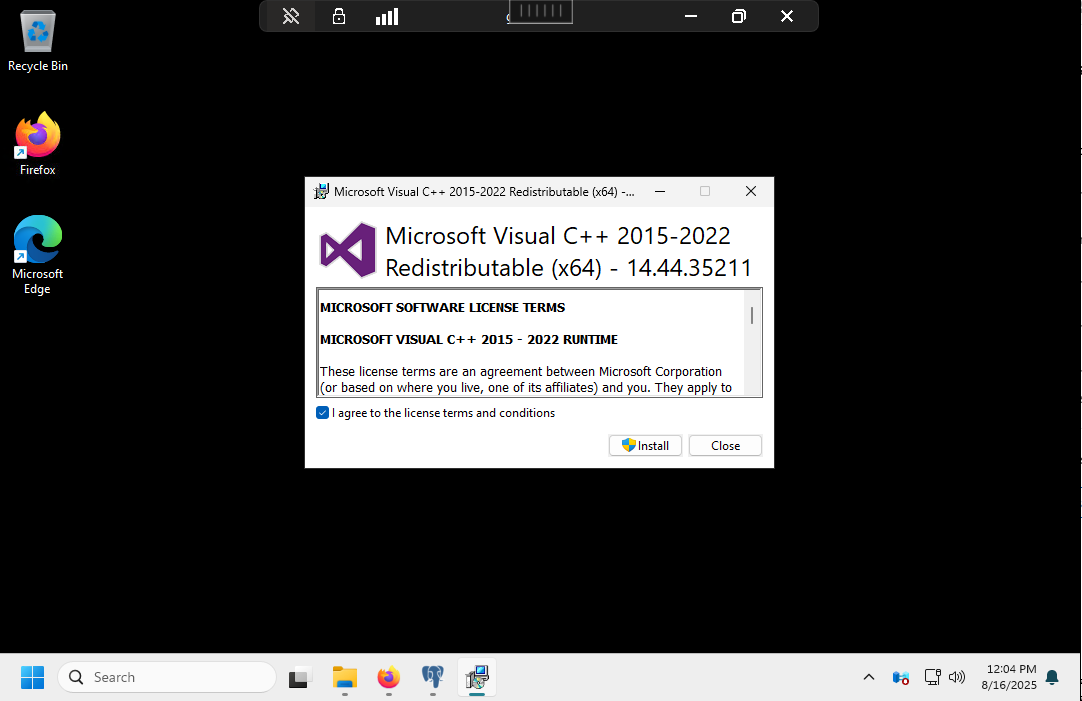
Install the Visual C++ x64 Runtime
Download and install the Microsoft Visual C++ x64 Runtime.
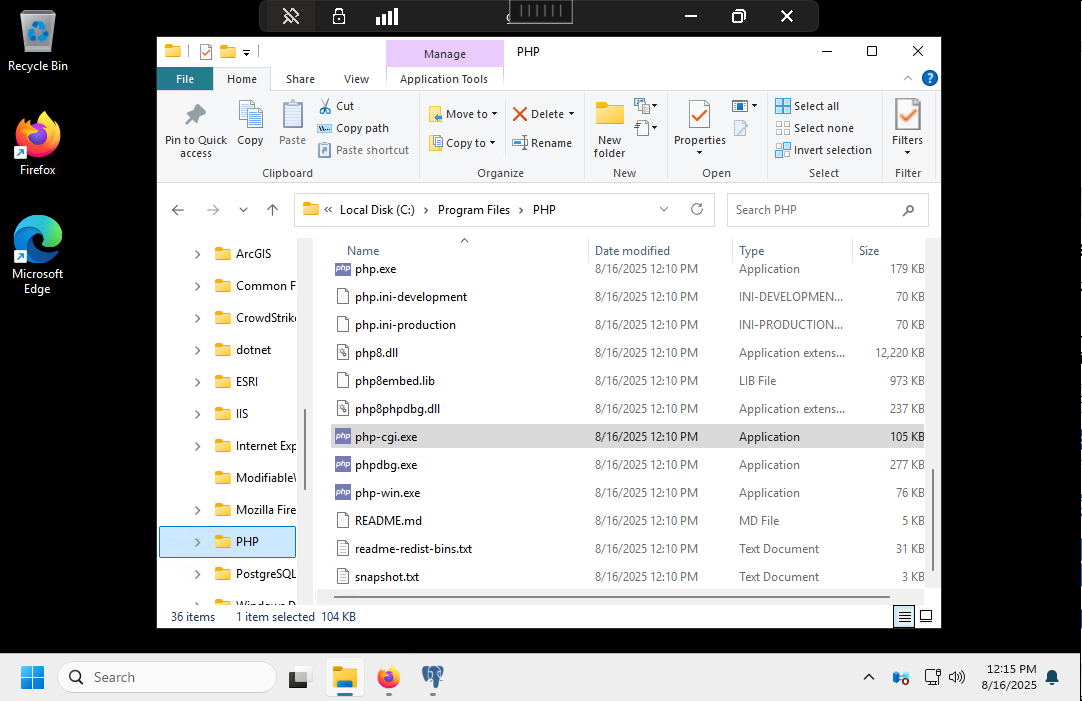
Install PHP
Download PHP Non-Thread-Safe version for Windows and unzip it into C:\Program Files\PHP
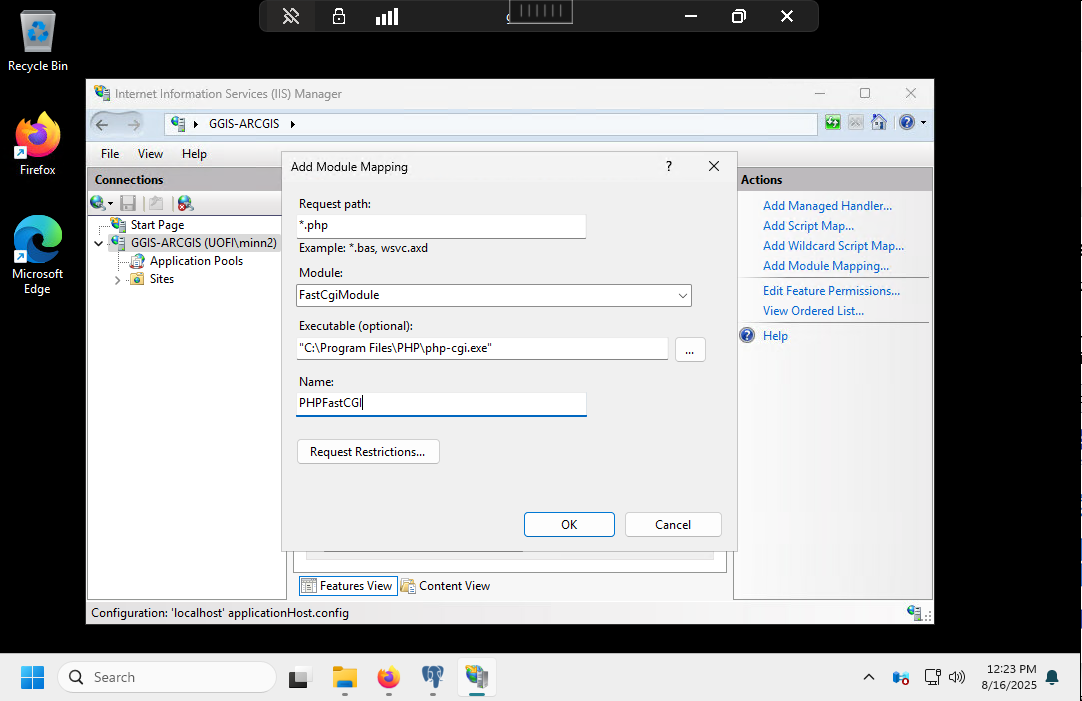
Add a Handler Mapping to Make IIS Execute PHP files as Scripts
- Open IIS Manager
- Clicking on the server node in the left panel
- Open the Handler Mappings applet.
- Select Add Module Mapping
- Request path: *.php
- Module: FastCgiModule
- Executable file: Browse to C:\Program Files\PHP\php-cgi.exe
- Name: PHPFastCGI
- Add index.php to the Default Document list in IIS
- Restart IIS
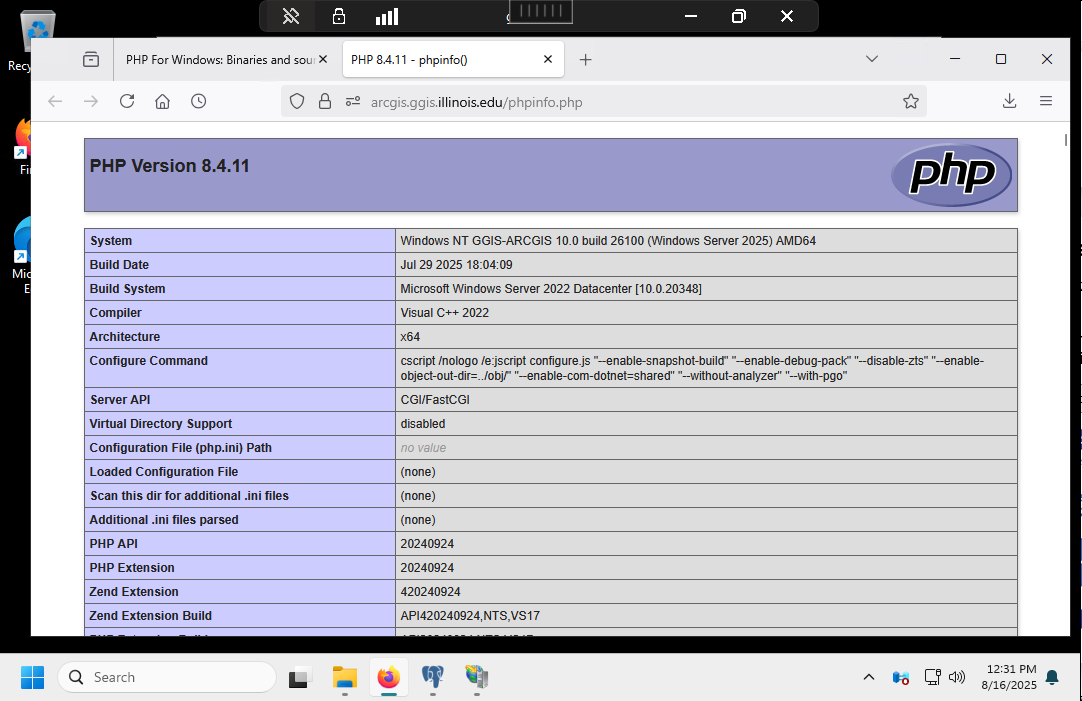
Verify PHP is Working
Use notepad to create a phpinfo.php file in the home www directory (default C:\inetpub\wwwroot) containing a call to the phpinfo() diagnostic function.
<?php phpinfo(); ?>
Navigate to the PHP file in a browser to verify PHP works.
Enable the PostgreSQL Extensions
Enable the PostgreSQL extensions. If you try running Adminer with default php you will probably get the message None of the supported PHP extensions (PgSQL, PDO_PgSQL) are available..
- Go into the C:\Program Files\PHP folder and rename php.ini.production to php.ini
- In the php.ini file, located in C:\php, uncomment (remove the leading semicolon) for the following lines:
- extension_dir = "ext"
- extension=pdo_mysql
- extension=pdo_odbc
- extension=pdo_pgsql
- extension=pdo_sqlite
- extension=pgsql
- Restart IIS

Install Adminer
Download the Adminer PHP file and place it in the home www directory.
You should be able to invoke the script from a browser and use it to log into and manage your database.