ArcGIS Survey123
There are often situations in research, business, or government work where you may need to collect field data that includes a geospatial component. Field data is data collected outside of a traditional controlled workplace setting like a laboratory or office (Fulcrum 2023).
This tutorial will demonstrate the use of ArcGIS Survey123 for field data collection.
ArcGIS Survey123 is a form-based environment for creating, sharing and analyzing surveys that can be used for field data collection. ArcGIS Survey123 is integrated with ArcGIS Online, so that your field data can then be mapped or analyzed once you get back to your computer.
Some examples of field data collection include:
- Conducting urban tree censuses
- Recording archaeological excavation information
- Recording building damage information after earthquakes
- Tracking violations of campus tobacco use restrictions
- Creating vacant property inventories
Create the Survey Form
- Log into https://survey123.arcgis.com using your organization credentials.
- At your My Surveys home page, select + New survey.
- Select Blank survey.
- Give your survey a meaningful title and Description.
- Note that the title of your survey and the title displayed to the survey users are separate fields. You may want to keep these the same to avoid confusion.
- If you are in a large organization, you may want to place your name or some other kind of personal identifier at the beginning of the name so you can keep track of which surveys are yours.
- Add form fields. For this example, we add
- Singleline Text fields for attribute data
- A Map for location
- An Image field to attach images captured in the field.
- Preview the form to make sure it appears as you wish, especially on mobile devices.
- Publish the form.
- If you want people other than you to be able to submit data, on the Collaborate page under Who can submit to this survey?, change the permissions to the appropriate group or Everyone.
- Click the link icon to get a link and e-mail or text that to your cellphone.
Collect Data
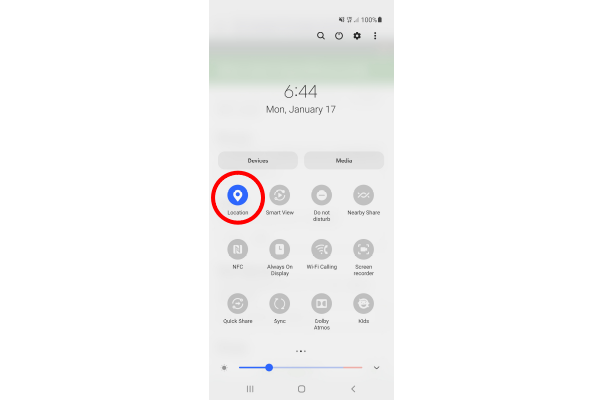
- Turn on location services (GPS) on your phone so you can collect location data.
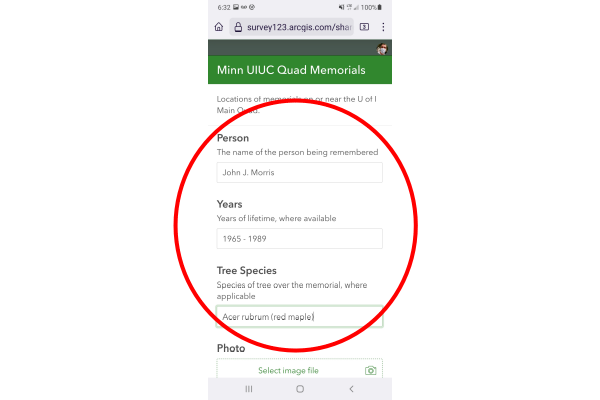
- Go to the location where you are collecting data, open the survey link and fill out the form fields (attributes).
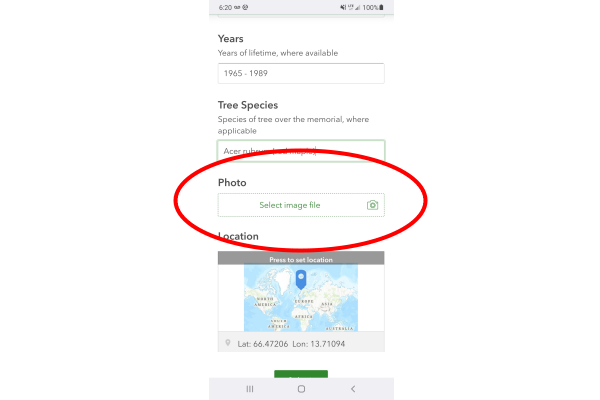
- If desired, take a photo and then attach the photo to the form.
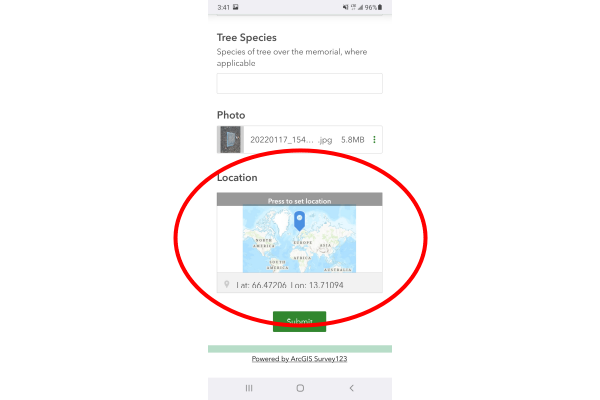
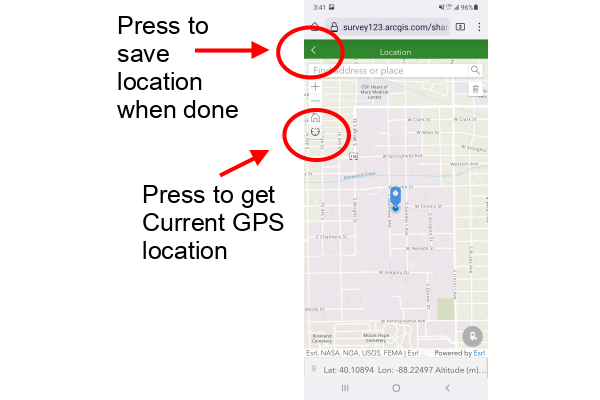
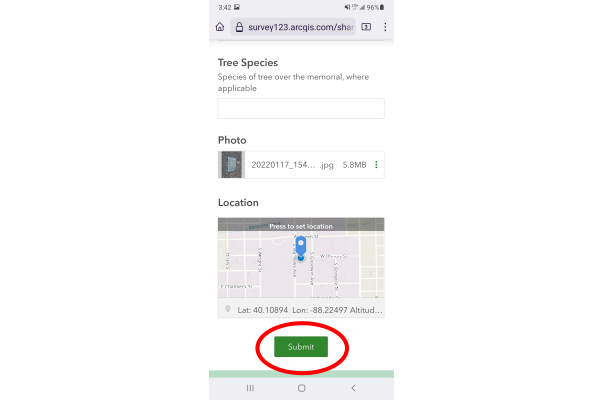
- Press to Set Location
- Press the current location button to use your cellphones location services to get your current position. You may need to press it a second time to update from the last location where you pressed the button. Then click the back arrow to return to the form.
- Press Submit when you have entered the needed data. Depending on your cell connection, the submission may take a few seconds, especially if you have attached a photo.
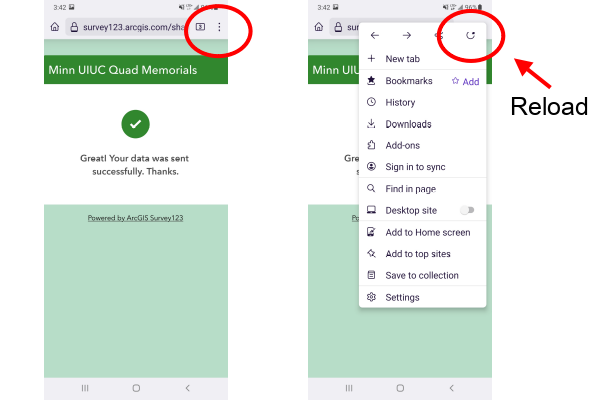
- To repeat in a new location, press the reload button in your browser.
On old or incompatible browser apps you may get the error Failed to submit: Promise.allSettled is not a function. The solution is to update your browser or use the Chrome browser.
Map the Data
- Go to the Data tab to review the submissions.
- Delete or edit any flawed submissions.
- Select Open in Map Viewer.
- If desired, Change Style for the dots.
- If you want labels, click ellipsis (...) beside the layer, select Create labels and choose an appropriate attribute for labeling.
- Click the Save icon, select Save As, and save the map into your ArcGIS Online content under a meaningful name.
- Click the Share icon to change sharing and get a link to the map.
Feature Service
If you need information on the feature service created by ArcGIS Survey123, you can get the feature service endpoint URL from Map Viewer Classic by clicking the ellipsis (...) beside the layer, and choosing Description. The page that opens is the REST endpoint.
Using Collected Data in ArcGIS Pro
Because the data is stored in a feature service, that data can also be used in ArcGIS Pro for print mapping.
Export Data
ArcGIS Survey123 creates a feature service for storing data collected in your survey.
When you create maps with your survey data, the maps use this feature service so that the map is always current.
If you need a snapshot of the data at any particular time, you can export the data to spreadsheet or geospatial data files under the Data and Export.
Closing the Survey
When you are finished with collection, you should close the survey so your data cannot be accidentally or intentionally damaged by you or others.
Under Collaborate and Survey status, select Closed: not accepting responses.
You can reopen or schedule a reopening here as well.